In the world of injection molding, achieving flawless, smooth surfaces is more than just aesthetics—it’s the key to creating high-performance parts. Mold polishing plays a pivotal role in this process, ensuring that every part produced meets the highest standards of quality, precision, and durability.
In this blog, we will identify what is mold polishing, what are types of common mold polishing techniques, step-by-step instruction during processing before given detailed considerations. By perfecting this critical step, manufacturers can speed up cycle times, ensure easier part ejection, and deliver products that truly stand out in the marketplace.

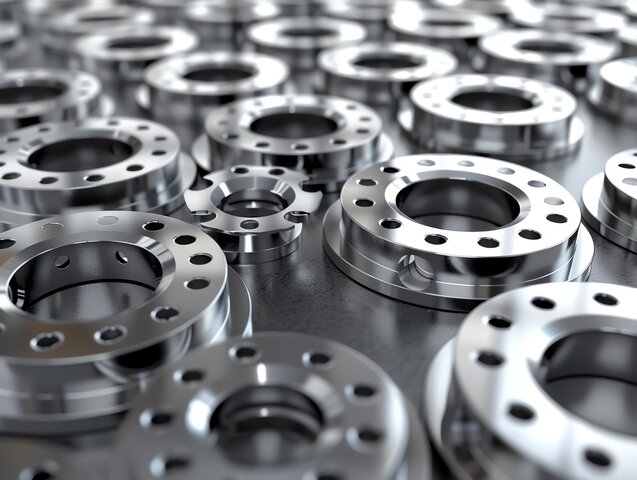
industrial washers and spacers
What is Mold Polishing?
Mold polishing is a technique used to achieve smooth surfaces on molds, especially in the plastic injection molding industry. It involves removing the raised or convex parts of the mold through various methods, such as plastic deformation and cutting. The process typically relies on manual polishing using tools like wool wheels, whetstone strips, and sandpaper.
In some cases, manufacturers use super-precision polishing methods for materials requiring a high-quality surface finish. These methods involve pressing liquids containing abrasives onto the workpiece surface at high speeds using special tools. This technology can achieve a surface roughness as low as Ra 0.008 micrometers.

Importance of Mold Polishing in Injection Molding
Ensuring smooth ejection and demolding of plastic parts
Improving the aesthetics and surface finish of the final product
Enhancing wear and corrosion resistance of the mold surface
Reducing injection cycle time and increasing production efficiency
Differences Between Mold Polishing and Surface Finishing in Other Industries
Mold polishing differs from surface finishing in other industries in several ways. In the context of plastic injection molding, polishing is often referred to as "mirror processing" due to its high standards for smoothness and geometric accuracy. It not only focuses on the polishing process itself but also emphasizes the importance of achieving specific surface roughness values and maintaining the mold's geometric integrity.
| Aspect | Mold Polishing | Surface Finishing in Other Industries |
| Purpose | Smooth ejection, defect prevention, improved aesthetics | Varies by industry |
| Standards | High standards for smoothness and geometric accuracy | Depends on specific industry requirements |
| Terminology | Often referred to as "mirror processing" | Various terms used |
| Focus | Polishing process, surface roughness, geometric integrity | Process-specific, industry-dependent |
Types of Mold Polishing Techniques
1. Mechanical Mold Polishing
Mechanical polishing is the most common mold polishing technique, widely used across various industries. It relies on manual methods to smooth mold surfaces, using tools like sandpaper, oil stones, and wool wheels. Manufacturers favor this technique for its simplicity and effectiveness, especially in achieving polished surfaces for general-purpose molds.
Tools Used in Mechanical Polishing
Sandpaper: Varying grades (e.g., 180#, 320#, 600#) are used to progressively smooth out the mold surface.
Oil Stones: Commonly used to polish harder surfaces or when more precision is needed.
Wool Wheels: Applied for the final polishing stage to create a uniform, smooth finish.
Best Practices for Mechanical Polishing
Start with coarse tools like oil stones, then gradually use finer grades of sandpaper.
Consistent pressure and even strokes help avoid scratches or uneven surfaces.
Clean tools between stages to prevent contamination from coarser abrasives.
Advantages of Mechanical Polishing
High-Volume Production: This technique is ideal for mass production, as it's quick and requires fewer resources.
Versatility: Can be applied to different mold materials and shapes, making it highly adaptable.
Applications of Mechanical Polishing
Mechanical polishing is frequently used in industries requiring clear, smooth surfaces, such as:
Optics: Polishing lenses for cameras, microscopes, and telescopes.
Mirrors and Glass: Ensuring clarity and reflection quality.
Precision Instruments: Molds for medical and scientific devices.
2. Chemical Mold Polishing
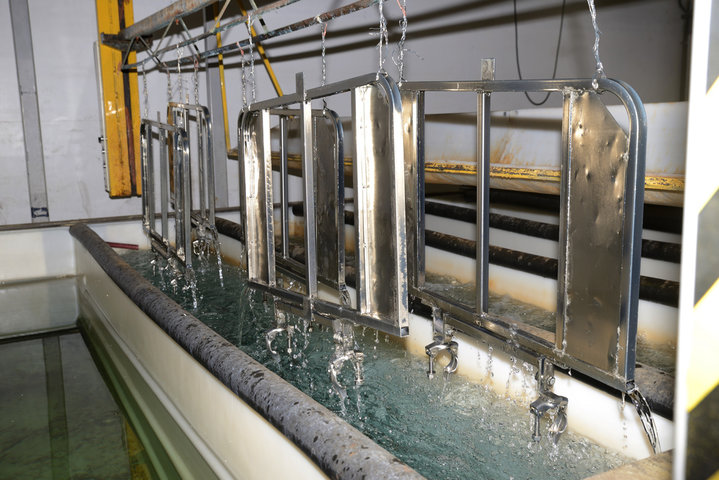
Chemical polishing involves immersing the mold in a chemical solution to remove imperfections from the surface. This method is appreciated for its simplicity, as it doesn’t require extensive machinery and can be applied to complex mold shapes.
How Chemical Polishing Works
The chemical reaction dissolves surface irregularities, gradually smoothing the mold. It's especially useful for molds with intricate designs, as the chemical reaches areas that mechanical tools may miss.
Challenges in Chemical Polishing
Solution Preparation: Proper formulation of the chemical solution is critical. Incorrect ratios can result in uneven polishing.
Surface Defects: If not carefully applied, the solution can create uneven surfaces or fail to polish uniformly.

3. Electropolishing (Electrolytic Polishing)
Electropolishing, also known as electrolytic polishing, differs from chemical polishing in that it eliminates cathodic reactions, resulting in a more uniform finish. The process involves both macroscopic and microscopic polishing phases.
How Electropolishing Works
Macroscopic Phase: The surface roughness is reduced as the material is dissolved in an electrolytic solution.
Microscopic Phase: Anodic polarization creates a thin film over the surface, producing a glossy and reflective finish.
Benefits of Electropolishing
4. Ultrasonic Mold Polishing
Ultrasonic polishing is a specialized technique used for molds requiring high precision. The process involves placing the mold in an ultrasonic machine equipped with a handpiece, which vibrates abrasives at ultrasonic frequencies.
Key Equipment
Advantages of Ultrasonic Polishing
High Precision: Ideal for intricate molds with narrow gaps or complex geometries.
Efficiency: Ultrasonic polishing significantly reduces lead time compared to other techniques, making it ideal for high-tolerance molds.
5. Fluid Mold Polishing
Fluid polishing uses a mixture of abrasive particles and a fluid medium to polish the mold’s surface. The fluid, typically a polymer substance, flows over the mold at low pressure, gradually smoothing out surface imperfections.
Importance of Fluid Application
Challenges in Fluid Polishing
Mold Polishing Tips and Best Practices
Follow these essential techniques for effective mold polishing, ensuring precision and avoiding common surface defects.
1. Inspect and Clean the Workpiece Surface
Clean the workpiece thoroughly before polishing to remove any dirt or debris. Use kerosene or other solvents for a deep clean, ensuring no contaminants scratch the surface during polishing.
Pro Tip: Always use a clean cloth to dry the surface after cleaning. Any leftover solvent could mix with abrasives and cause imperfections.
2. Start Polishing from Challenging Areas
Begin polishing in hard-to-reach or intricate areas such as deep corners. Move gradually to simpler sections like flat surfaces or large curves.
Pro Tip: Use smaller tools or shaped oil stones for tight spots to avoid missing detailed areas.
3. Polish Multiple Components Separately
If the mold consists of multiple components, polish each one individually. This ensures uniformity when the parts are later assembled.
Pro Tip: Label each component after polishing to maintain alignment and avoid confusion during assembly.
4. Use Oilstone and Straight Steel Sheets to Detect Undercuts
After polishing flat or large surfaces, use an oilstone paired with a straight steel sheet to identify undercuts or unevenness.
Pro Tip: Perform light transmission tests using a steel sheet to reveal even the smallest imperfections in flat surfaces.
5. Attach Sandpaper or Saw Blades for Edge Protection
Safeguard critical edges or surfaces by attaching fine-grit sandpaper or a saw blade to the polishing tool. This prevents accidental damage to precision areas.
Pro Tip: Adjust the grit based on how sensitive the edge is—finer for delicate areas, coarser for stronger surfaces.
6. Maintain a Horizontal Oilstone Handle
When polishing, keep the oilstone handle as flat as possible—ideally less than a 25° angle. This minimizes the risk of gouging the surface with deeper scratches.
Pro Tip: Rotate the mold periodically to maintain consistency in pressure and avoid creating any visible lines.
7. Match the Tool Shape to the Mold
Select polishing tools that match the shape of the mold to prevent deformation during the process. Use custom-shaped tools for complex designs.
Pro Tip: For molds with intricate geometry, create custom wooden or resin-based tools that fit exactly into specific contours for a perfect finish.
Considerations for Mold Polishing
When it comes to mold polishing, several factors must be considered to ensure the final product meets the desired quality and functionality. These include the molding process, material selection, and cost implications.
Molding Process Considerations
Impact of Plastic Shrinkage on Demolding Force
During the cooling process, plastic parts shrink, which increases the force needed for demolding. If the mold surface isn't polished smoothly, the plastic could stick, leading to defects or damage.
Pro Tip: Use highly polished mold surfaces to minimize ejection force, especially for complex designs.
Importance of Smooth Polishing for Parts with Minimal or No Draft Angles
For parts requiring minimal or no draft angles, a smooth polished mold becomes crucial. These surfaces reduce the likelihood of parts sticking, ensuring clean ejection without damage.
Pro Tip: Specify mirror polishing for parts with no draft angles to avoid ejection issues.
Specifying Mold Polishing Requirements Based on Part Design and Functionality
Different parts have unique design features and functionality, which require specific mold polishing techniques. For functional components, smooth finishes ensure proper fit and operation, while aesthetic parts demand high gloss for visual appeal.
Pro Tip: Match polishing specifications to the function of the plastic part. Functional parts may require fine polishing, while aesthetic parts may need mirror finishes.
Material Considerations
Relationship Between Plastic Material Properties and Surface Gloss
The inherent properties of plastics influence how they respond to mold polishing. Softer plastics like polyethylene produce a less glossy surface compared to rigid materials like polystyrene, which naturally create a shinier finish.
Pro Tip: Choose your polishing level based on the material’s ability to reflect light—softer plastics may not require ultra-fine polishing.
Suitable Mold Finishes for Different Plastic Materials
Not all plastics behave the same. For example, soft plastics like PVC or polyurethane might stick to highly polished surfaces, requiring a lighter polishing finish. In contrast, rigid plastics like acrylics demand precise, fine finishes to avoid surface defects.
Pro Tip: Match the mold finish to the plastic material—lightly blasted finishes work better for softer plastics, while rigid plastics benefit from mirror polishing.
Importance of Specifying the Appropriate Mold Finishing for Each Plastic Material
Specifying the right mold finish helps prevent issues during molding. For example, using the wrong finish can cause plastic parts to stick to the mold or result in poor surface quality.
Pro Tip: Discuss the material properties with the mold maker to ensure the chosen finish supports both performance and aesthetics.
Cost Considerations
Stepwise Nature of the Mold Polishing Process
Mold polishing occurs in steps, starting from coarse polishing and moving to finer finishes. The number of steps required depends on the desired finish—rough finishes need fewer steps, while high-gloss finishes require more.
Pro Tip: To reduce costs, opt for coarser finishes if your parts don't require high-gloss surfaces.
Relationship Between Required Finish and Number of Polishing Steps
The higher the surface quality needed, the more polishing steps are involved. For example, mirror finishes may involve multiple rounds of polishing with finer abrasives.
Pro Tip: Consider how critical the surface finish is to the function of the part before opting for higher polishing levels.
Impact of Mold Polishing on Overall Mold Cost
High-precision mold polishing increases the overall cost of mold manufacturing. Finishing steps alone can represent 10% or more of the total mold cost, particularly for molds producing high-clarity parts like lenses.
Pro Tip: When budgeting, factor in the extra costs for parts that demand a polished, high-gloss surface.
Variability in Mold Polishing Costs Among Injection Molding Companies
Costs vary widely depending on the mold maker’s experience, tools, and equipment. Some companies may offer competitive rates for standard finishes, but high-gloss or specialized finishes could significantly increase the price.
Pro Tip: Request detailed quotes from multiple suppliers to understand cost differences and ensure they include the level of polishing required for your project.
Conclusion
In conclusion, mold polishing is a vital aspect of the injection molding process, directly impacting the quality, appearance, and functionality of the final product. This article has explored various types of mold polishing techniques, including mechanical, chemical, electrolytic, ultrasonic, fluid, and magnetic polishing, along with their advantages and considerations. By understanding the importance of mold polishing, the key factors to consider, and the best practices to follow, manufacturers can ensure optimal results and efficient production.
Partnering with experienced injection molding service providers, such as Team MFG, can help companies achieve their desired outcomes by leveraging expertise, state-of-the-art technology, and a commitment to quality. Embracing mold polishing as a critical component of the injection molding process is essential for success in today's competitive manufacturing landscape.
Frequently Asked Questions About Mold Polishing
Q: What is the purpose of mold polishing?
A: To create a smooth surface on the mold cavity for improved part quality and easier ejection.
Q: What are the most common mold polishing techniques?
A: Mechanical polishing, chemical polishing, electropolishing, and ultrasonic polishing.
Q: How does mold polishing affect the injection molding process?
A: It reduces cycle times, minimizes defects, and improves the overall quality of molded parts.
Q: What factors should be considered when choosing a mold polishing method?
A: Mold material, desired surface finish, mold geometry, production requirements, and budget.
Q: How does the level of mold polishing affect the final product?
A: Higher polishing levels result in smoother, glossier surfaces, while lower levels may lead to matte or textured finishes.
Q: Can mold polishing be performed on any type of mold material?
A: Yes, but the choice of technique and abrasives may vary based on the mold material's properties.
Q: How often should mold polishing be performed?
A: Regularly, based on factors like mold material, plastic type, mold geometry, and production volume.


