Have you ever wondered how engines or medical tools achieve such precise surfaces? The answer lies in honing—a process crucial for achieving perfection in metalwork. Honing plays a vital role in industries like automotive, aerospace, and medical, ensuring exact sizes and smooth finishes.
In this post, you’ll learn what honing is, the tools involved, and how the process works.
What is Honing?
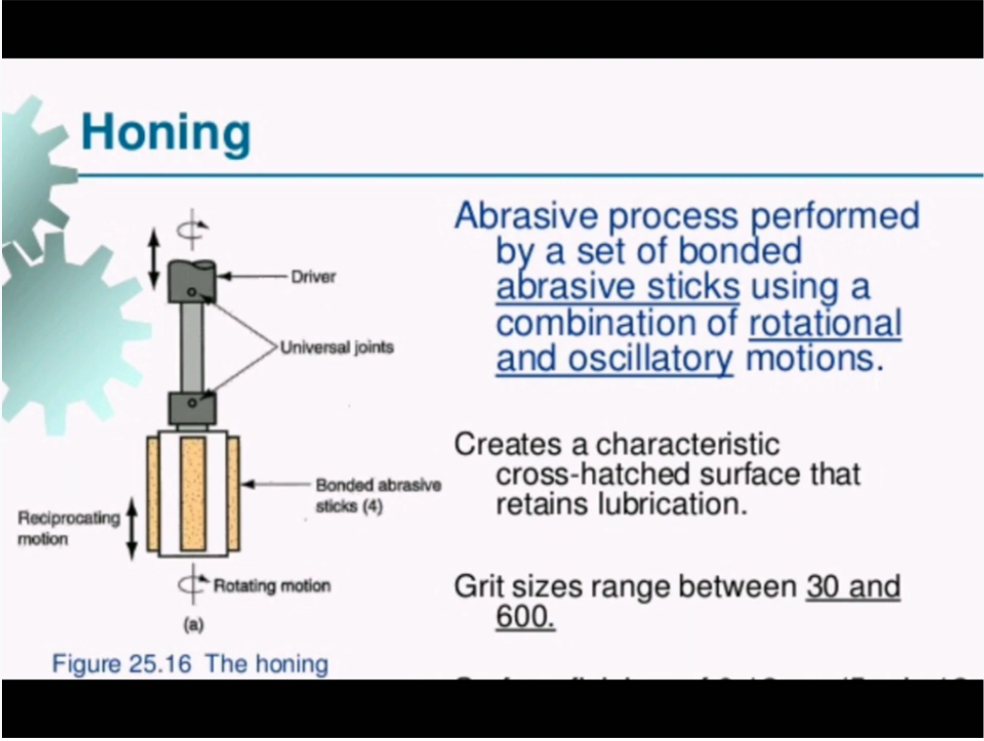
Honing is an abrasive machining process that creates a precision surface finish on a workpiece. It's defined as the act of sharpening or finishing a surface using a honing stone or a hone.
The process involves using abrasive stones, under controlled pressure, to remove material along a specific path. This results in improved geometric form and enhanced surface finish of the workpiece, similar to other CNC precision machining techniques.

Key characteristics of honing include:
Honing is particularly effective in providing the final sizing and creating the desired finish pattern on the interior surfaces of tubing or cylinder bores. It allows for the perfection of bore geometry, size control, final surface finish, and surface structuring.
The process differs from similar operations like lapping and superfinishing. Lapping involves applying loose abrasive particles between the workpiece and the tool, while superfinishing uses a powered tool with an abrasive stone or tape to refine the surface.
In contrast, honing relies on bonded abrasive stones that are mounted on a tool and applied with controlled pressure and motion. This allows for more precise control over the finishing process and the ability to achieve tighter CNC machining tolerances.
Some key differences between honing and CNC turning and milling or grinding are:
Honing stones are softer than grinding wheels
Honing applies lower pressure than grinding
Honing stones self-dress during operation
Honing creates a cross-hatch pattern
Why is Honing Needed?
Honing is a vital process in manufacturing. It's used to correct and perfect the geometry, size, surface finish, and surface structure of bores.
Manufacturers rely on honing to achieve tight tolerances and create desired finish patterns on the interior surfaces of various components. The process helps ensure proper fit, function, and performance of the final product.

Here are some key reasons why honing is needed:
Correcting bore geometry
Straightness
Roundness
Cylindricity
Achieving precise sizes
Diameter control
Consistency
Improving surface finish
Smoothness
Cross-hatch pattern
Enhancing surface structure
Plateau finishing
Oil retention
Honing is applicable to a wide range of materials, including metals, ceramics, and composites. It can be used on parts with various hardness levels, from soft aluminum to hardened steel.
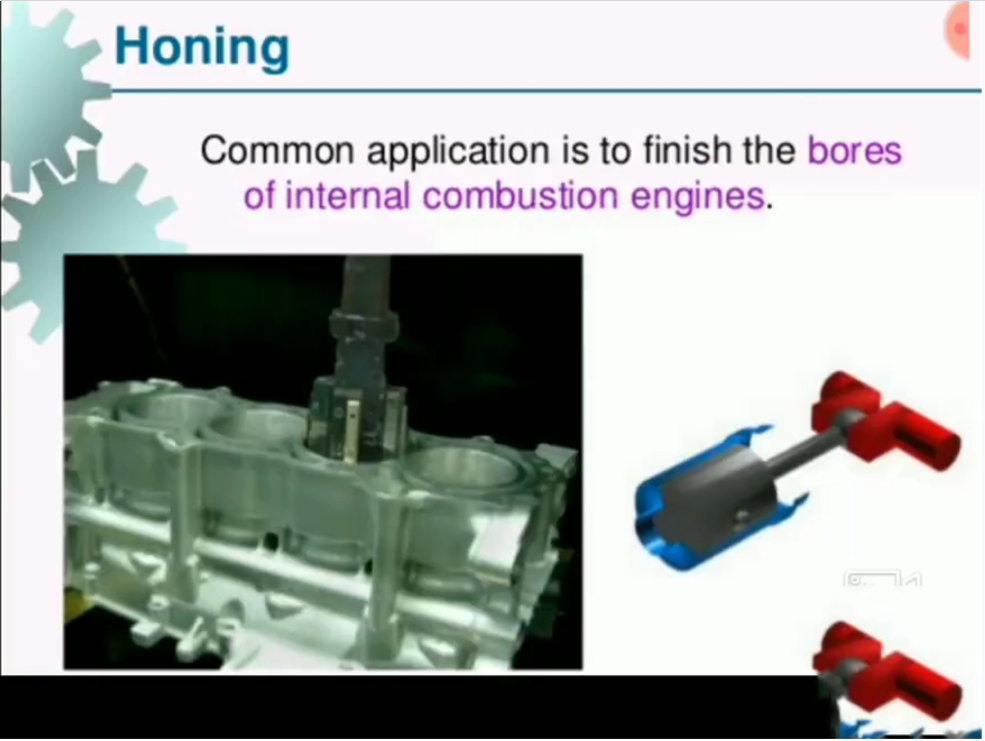
The process is particularly useful for finishing cylinder bores in engines, where proper geometry and surface finish are critical for sealing, lubrication, and wear resistance. Other common applications include hydraulic cylinders, bearing bores, and gears, especially in automotive parts and components manufacturing.
Honing is often used as a final finishing step after processes like boring, drilling, or grinding. It helps remove any remaining irregularities and brings the surface to the desired specifications.
The ability to achieve tight tolerances is one of the key advantages of honing. With modern honing machines and abrasives, it's possible to hold tolerances as tight as ±0.0001 inches (±0.0025 mm) on diameter and straightness.
In addition to precision, honing can also improve the functional properties of surfaces. The cross-hatch pattern created by honing helps retain lubricants and distributes wear evenly, leading to better performance and longer component life.
Honing Process Mechanics
Honing is a unique machining process. It differs from grinding in several key ways. Understanding these differences is crucial to achieving the best results.
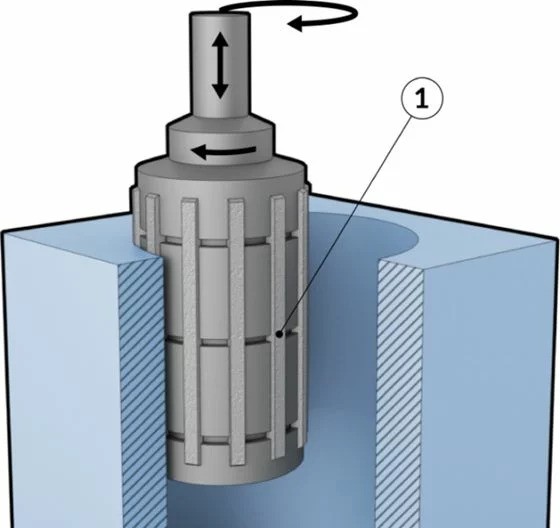
One of the most important aspects of honing is its self-truing nature. Unlike grinding, where the wheel follows a simple path, honing stones follow a complex motion. This motion involves both rotation and oscillation, similar to some CNC turning and milling operations.

The complex motion of honing stones leads to an averaging effect. Each part of the stone contacts a larger area of the workpiece surface. This helps even out any imperfections in the stone's shape.
As a result, both the workpiece and the honing stones wear together until they conform to the average shape of the stone's cutting surface. This self-truing action is why honing can achieve very high accuracy and consistency, often exceeding standard CNC machining tolerances.
In contrast, the accuracy of grinding is limited by the precision of the grinding wheel's shape and the stiffness of the machine. Any inaccuracies in the wheel will be transferred to the workpiece.
Another key difference is the compliance requirement in honing machines. Honing relies on the averaging effect between the stone and the workpiece. To achieve this, the machine must allow for some compliance or flexibility.
This is why honing machines use hydraulic or pneumatic pressure to apply the stones, rather than rigid mechanical feeds like in grinding. The compliance allows the stones to conform to the workpiece and maintain consistent contact.
The table below summarizes the key differences between honing and grinding:
| Aspect | Honing | Grinding |
| Stone Motion | Complex (rotation + oscillation) | Simple (rotation) |
| Self-Truing | Yes, through averaging effect | No, relies on wheel dressing |
| Accuracy | Can exceed machine accuracy | Limited by machine and wheel accuracy |
| Machine Compliance | Required for averaging effect | Stiffness is prioritized |
| Stone Application | Hydraulic or pneumatic pressure | Rigid mechanical feed |
These differences make honing a crucial process in CNC precision machining, especially for achieving high-precision surfaces and tight tolerances.
Honing Tools and Equipment
Honing requires specialized tools and equipment. Each component plays a crucial role in the process. Let's take a closer look at the key elements.
Honing Stones
Honing stones are the cutting tools. They're composed of abrasive grains bonded together. The most common abrasive materials are diamond and silicon carbide.
The grit size of the stones determines the surface finish. Finer grits produce smoother finishes. Grit sizes range from about 150 to 800.

Honing Mandrels
Mandrels hold and position the honing stones. They're typically made of steel or carbide. The mandrel design allows for stone expansion and replacement.
Honing Oil
Honing oil serves as both a coolant and a lubricant. It helps flush away debris and prevents the stones from loading up. Special formulations provide enhanced lubricity and washing action.
Hone Guides and Guide Bushings
Hone guides align the tool with the bore. They prevent the stones from damaging the workpiece during entry and exit. Guide bushings are wear-resistant inserts that provide additional support and guidance.
Adjustable Cones
Adjustable cones are used for blind bore honing. They allow the stones to expand at the bottom of the bore. This compensates for stone wear and maintains size control.
Single Pass Honing Tools
Single pass tools are designed for rapid stock removal. They feature a tapered, abrasive-coated mandrel. The tool expands to the desired size and hones the bore in one pass.

Single pass honing machines offer several advantages:
Flexible design
Reduced downtime
Other important honing equipment includes:
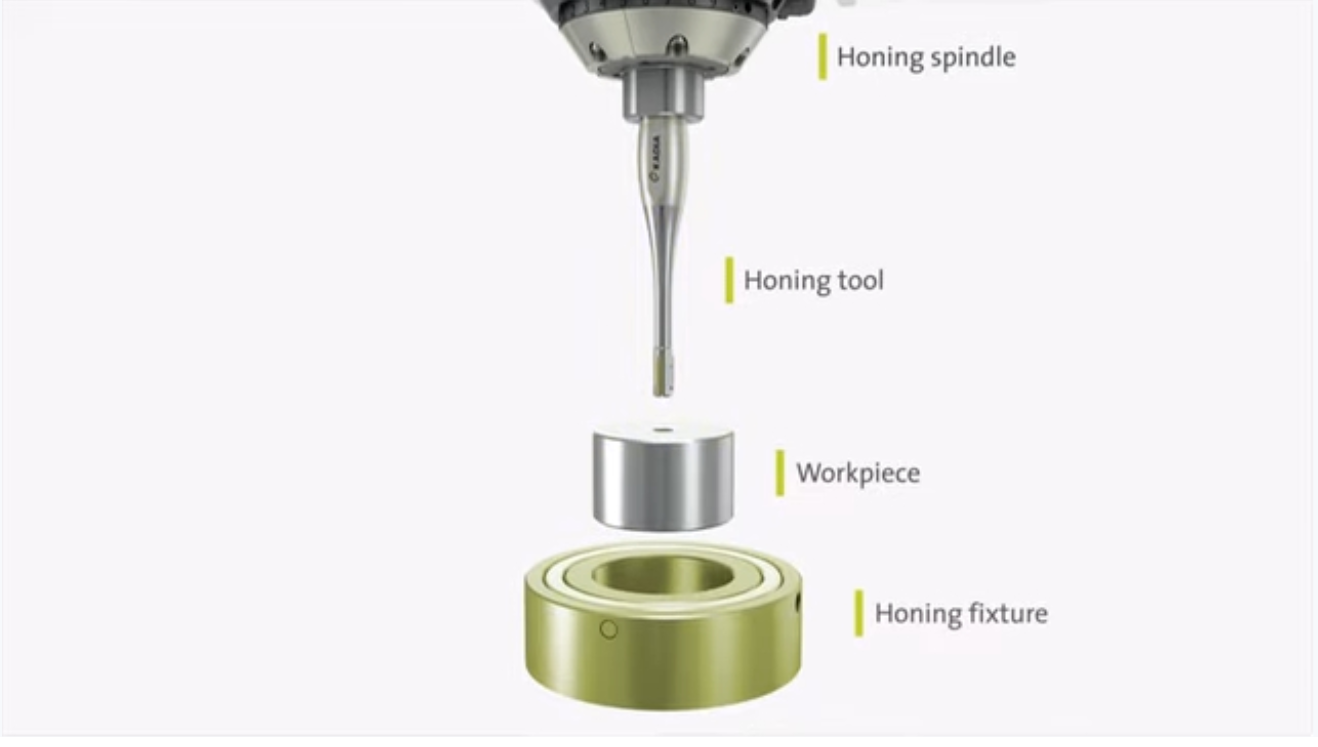
Spindle drives
Stroking mechanisms
Coolant delivery systems
Workholding fixtures
Advantages of Honing
Honing offers numerous advantages over other finishing processes. These benefits make it an essential tool in modern manufacturing.
One of the key advantages is its ability to achieve very high accuracy. Honing can produce bore geometries with exceptional roundness, straightness, and size consistency. It can hold tolerances as tight as ±0.0001 inches (±0.0025 mm).
Another advantage is its ability to maintain the original bore centerline. The self-truing action of the honing stones ensures that the tool follows the existing bore axis. This eliminates any misalignment or runout.
Honing is also highly versatile. It can be used on a wide range of materials, from soft metals like aluminum to hard ceramics and carbides. The process can handle parts with different hardness levels, including case-hardened and heat-treated components.
The honing process eliminates the need for chucking or locating the workpiece. The tool is guided by the bore itself, so there's no risk of introducing errors from fixturing. This simplifies the setup and reduces the potential for scrap.
Honing creates a unique crosshatched surface pattern. This pattern is formed by the intersection of the rotational and oscillating motions of the honing stones. The resulting surface has excellent oil retention and lubrication properties.

The crosshatched pattern also helps to distribute wear evenly and extends the life of mating components. This is particularly beneficial in applications like engine cylinders, where the piston rings must seal against the bore surface.
Honing machines are relatively simple and adaptable. They have lower capital costs compared to other precision finishing processes. The tooling is also less expensive and can be easily modified for different bore sizes and shapes.
Here are some additional advantages of honing:
Limitations of Honing
While honing provides many advantages, it does come with a few limitations that manufacturers should consider.
Relatively Slow Process
One of the most common drawbacks of honing is its relatively slow process. Compared to other machining methods, it removes material at a slower rate. This can be a disadvantage for high-volume production where speed is essential. However, advancements in technology, such as improved honing stones and machinery, have reduced cycle times, making the process faster than before.
Potential for Oval Holes in Horizontal Honing
Another limitation occurs in horizontal honing, especially when working with thin or unsupported workpieces. If the part isn't properly supported or rotated during the process, there is a risk of creating oval-shaped holes. This can affect the accuracy of the finished part. Proper support or rotating the workpiece can help minimize this risk and ensure that the bore remains round.
Key Limitations of Honing:
Slow process, though improving with new technologies.
Risk of oval holes in horizontal honing without adequate support.
Applications of Honing
Honing is widely used across various industries, each benefiting from the precision and surface finish it offers. Here’s a look at some key applications.
Automotive Industry
In the automotive industry, honing is crucial for the precision machining of engine components. It is used to finish engine cylinders and crankshafts, ensuring that they meet the tight tolerances required for smooth operation. The process improves bore geometry and surface finish, which is vital for components like piston rings to create a proper seal in cylinders.
Engine Cylinders: Honing creates a crosshatched pattern that helps retain oil and lubrication in engine cylinders.
Crankshafts: The process ensures straightness and roundness, critical for the function of crankshaft journals.
Aerospace Industry
The aerospace industry relies on honing for both manufacturing and maintenance of critical parts. Engine components, bearings, and fasteners require extremely tight tolerances, which honing can provide. The process is used not only for finishing these parts but also during routine maintenance to ensure that engine components meet safety and performance standards.
Mold Making: High-Precision Mold Surfaces
In mold making, honing is used to improve the accuracy and consistency of mold surfaces. Molds require extremely smooth and precise surfaces to ensure the final parts are free of defects. Honing helps achieve the necessary surface quality, resulting in better part quality and consistency.
Medical Industry: Surgical Instruments and Implants
The medical industry depends on honing for producing surgical instruments and implants that meet strict tolerance requirements. Precision is essential in medical devices, where even the smallest deviation can impact performance and safety. Honing helps ensure that surgical tools and implants are smooth, accurate, and meet regulatory standards.
Surgical Instruments: The honing process ensures that instruments are free of burrs and defects, improving performance.
Implants: Honing creates precise surface finishes, which are critical for implants to integrate properly with the body.
How to Use Honing in Manufacturing
Honing is a versatile process used in manufacturing to achieve high precision and smooth surface finishes. There are different methods for implementing honing, depending on the scale and complexity of the task.
Machine Honing Operation
In machine honing, the process is controlled by CNC (Computer Numerical Control) systems, making it ideal for high-precision and automated operations. The CNC ensures consistency and accuracy, with minimal human intervention. This method is typically used in mass production, where tight tolerances and repeatable results are required.
CNC-controlled process: The machine precisely controls the honing stone’s movement, ensuring accurate bore sizes.
High precision: Suitable for industries like aerospace and automotive, where precision is crucial.
Manual Honing Operation
For smaller-scale or specialized applications, manual honing is used. Here, the operator controls the honing tool, moving it over the workpiece by hand. This method is more flexible but relies on the skill of the machinist. Manual honing is commonly used for one-off parts or tasks where automation isn’t feasible.
Operator-controlled process: The machinist guides the honing tool to create the desired surface finish.
Suitable for specialized applications: Ideal for low-volume production or parts with complex geometries.
Selecting the Right Honing Tools and Equipment
Choosing the correct honing tools and equipment is essential for achieving the best results. This includes selecting the proper honing stones, abrasives, and machine type. Factors like material hardness, bore size, and required surface finish must be considered when picking the right tools.
Setting Up and Operating Honing Machines
Proper setup is crucial to ensure the honing machine functions correctly. This involves aligning the honing tool with the workpiece and ensuring all parts are securely positioned. Calibration is essential to maintain precision throughout the operation.
Quality Control and Inspection of Honed Parts
After honing, quality control is necessary to inspect the finished parts. This includes measuring the bore diameter, roundness, and surface finish to ensure they meet specified tolerances. Tools like bore gauges and profilometers are used for inspection.
Honing vs. Lapping: Key Differences
Both honing and lapping are used to improve surface finishes, but they differ significantly in their operation and outcomes. Let’s explore the key differences between these two precision machining processes.
Mode of Operation
In honing, abrasive stones are used to remove material while the tool follows a complex path. This combination of rotation and reciprocation ensures a consistent surface. Lapping, on the other hand, uses a slurry of abrasive particles, applied to a flat or domed surface. The slurry is rubbed between the workpiece and a lapping tool, creating a fine surface finish.
Honing: Uses abrasive stones, moving in specific paths, typically for cylindrical parts.
Lapping: Involves abrasive slurry and works best for flat or domed surfaces.
Amount of Material Removed
Honing is a stock removal process, capable of removing small but significant amounts of material, making it ideal for adjusting bore size and shape. Lapping removes a much finer layer of material, often used for correcting surface imperfections without significantly altering part geometry.
Honing: Removes more material, perfect for bore correction.
Lapping: Removes less material, often less than a few micrometers.
Accuracy and Potential for Introducing New Flaws
While honing is highly accurate, its use of rotational motion can sometimes introduce oval shapes if not properly controlled, particularly in horizontal honing. In contrast, lapping is often more accurate, especially for smaller parts, due to the gentler process and flat working surface. However, lapping can’t correct significant geometric errors.
Honing: Accurate but can introduce minor shape issues in some cases.
Lapping: Extremely accurate for small parts, with less risk of new flaws.
Process Technicality and Operator Skill Requirements
Honing is generally more automated, with CNC machines handling the complex tool paths. This makes it easier to perform, though it still requires some operator skill for setup. Lapping is more labor-intensive and requires higher operator skill to achieve the desired surface quality, especially in manual lapping.
Honing: Typically CNC-controlled, requiring less manual input, similar to other CNC turning and milling operations.
Lapping: Manual process, demanding skilled operators for precise results.
Key Differences Summary:
| Criteria | Honing | Lapping |
| Mode of Operation | Abrasive stones with tool movement | Abrasive slurry with flat tool |
| Amount of Material Removed | Moderate | Minimal |
| Accuracy | High, but risk of ovality | Extremely high, especially on flats |
| Operator Skill Requirements | Moderate | High |
Conclusion
Honing is essential for precision manufacturing, offering high accuracy and smooth finishes in many industries. Whether you work in automotive, aerospace, or medical fields, honing can enhance performance and longevity of components. Consider honing for your next project to achieve the best results. For expert guidance, consult a honing service provider to ensure optimal outcomes for your applications.
Are you looking for precision machining and finishes for your projects? Team Mfg provides a wide of hole machining and surface treatment services, including drilling, boring, tapping, reaming, grinding, and honing. You will get the desired surface machined parts and prototypes in a cost-effective and fast turnaround way.


