Ever grabbed a hammer or twisted a wrench and noticed those cool, bumpy patterns on the handle? That's called knurling. It's a super neat way to make tools and other stuff not only look great but also easier to hold onto. In this article, I'm going to take you on a fun trip into the world of knurling. We're going to learn all about how this awesome process adds a special touch to things we use every day.
Knurling has come a long way from being done by hand to now using fancy machines that make really intricate designs. But what is knurling, exactly? How does it work, and why do so many things have these neat patterns? We're going to dive into all that and more, looking at different kinds of knurling patterns and how they're made. Whether you're just curious or need to know about knurling for a school project, stick around! This is going to be interesting.
Understanding Knurling
Overview of Knurling in Manufacturing
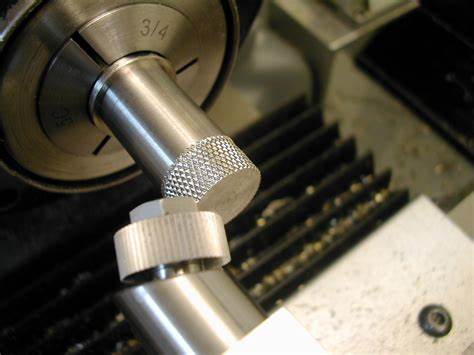
Knurling is a fascinating process in manufacturing. Think of it as a way to create a textured pattern on a surface. Usually, it's done on metal parts using Knurling Tools. This pattern not only looks good but also improves grip. It's pretty significant in modern industry. Why? Because it's used in so many things! From tool handles to medical equipment, knurling makes products easier and safer to hold.
Historical Perspective of Knurling
The term 'knurling' comes from 'knur'. This old word meant a small knot or a rough projection. Over time, the word evolved into 'knurled', describing the textured patterns we see on machined parts. This evolution wasn't just in language. The Knurling Process itself transformed too. It went from simple hand-crafted methods to advanced, precise machine techniques.
Key Points in Knurling
Let's break down knurling into simpler parts:
1. Types of Knurling: There are several types, like Straight Knurling, Diamond Knurling, and Helical Knurling. Each type has a unique pattern and use.
2. Common Defects: Sometimes, things go wrong. Under or Over Size, Surface Damage, and Tool Wear are common issues.
3. Achieving Perfect Knurling: To avoid mistakes, you need to Carefully Prepare the Workpiece, Choose the Appropriate Knurling Tool, and Apply Lubrication. Also, controlling the Optimal Cutting Speed and Adequate Tool Pressure is key.
Fun Facts and Tips
● Knurling Wheels and Knurling Inserts are parts of the tool that actually make the pattern.
● Push-Type Knurling Tools and Floating Knurling Tools are different types of tools used for varied applications.
● The pattern on a coin's edge? That's knurling! It's done to make the coin easier to grip and harder to counterfeit.
Whether you're working with a Lathe or a Machine, the right Materials, Patterns, and Process make all the difference. And don't forget about Aesthetics. A well-knurled part doesn't just function better, it looks great too!
The Knurling Process
Basic Principles of Knurling
Knurling is a fascinating part of making things. It's all about adding patterns to a surface. These patterns are not just for looks; they help us grip things better. Knurling Tools are the heroes here. They press patterns onto Machined Parts. It's like stamping, but for metal.
Equipment Used in Knurling
Several tools come into play in knurling:
● Knurling Wheels: These are the main parts that create the pattern.
● Knurling Inserts and Dies: They come in various shapes for different patterns.
● Push-Type and Floating Knurling Tools: Used depending on the job's needs.
Techniques and Methods
There are two main ways to do knurling: rolling and cutting.
1. Rolling Knurling: This method rolls the pattern onto the surface. It's like rolling out dough with a patterned roller.
2. Cutting Knurling: This is more about cutting into the metal to make the pattern. It takes away some metal but gives a sharp, clear design.
Step-by-Step Guide to the Knurling Process
Let's walk through the steps:
1. Prepare the Workpiece: Make sure it's clean and the right size.
2. Choose Your Tool: Depending on what pattern you want, pick the right Knurling Tool.
3. Set Up Your Machine: Whether it's a Lathe or another type, set it up with the tool.
4. Apply Lubrication: This helps in making the process smooth.
5. Start Knurling: Apply the tool to the workpiece. Control the Pressure and Speed.
6. Check Your Work: Look for Common Defects like Surface Damage or Tool Wear.
Every step is important for Precise and good-looking results. Whether it's Straight, Diamond, or Helical Knurling, each type has its own charm and use. Always aim for a perfect balance between Aesthetics and function.
Tools and Equipment for Knurling
Overview of Knurling Tools
Knurling tools are key in the Knurling Process. They are used to make patterns on Machined Parts. These tools come in various shapes and sizes, each suited for different Types of Knurling like Straight Knurling, Diamond Knurling, and Helical Knurling. It's important to Carefully Prepare the Workpiece and Choose the Appropriate Knurling Tool for the job.
Knurling Wheels: Types and Uses
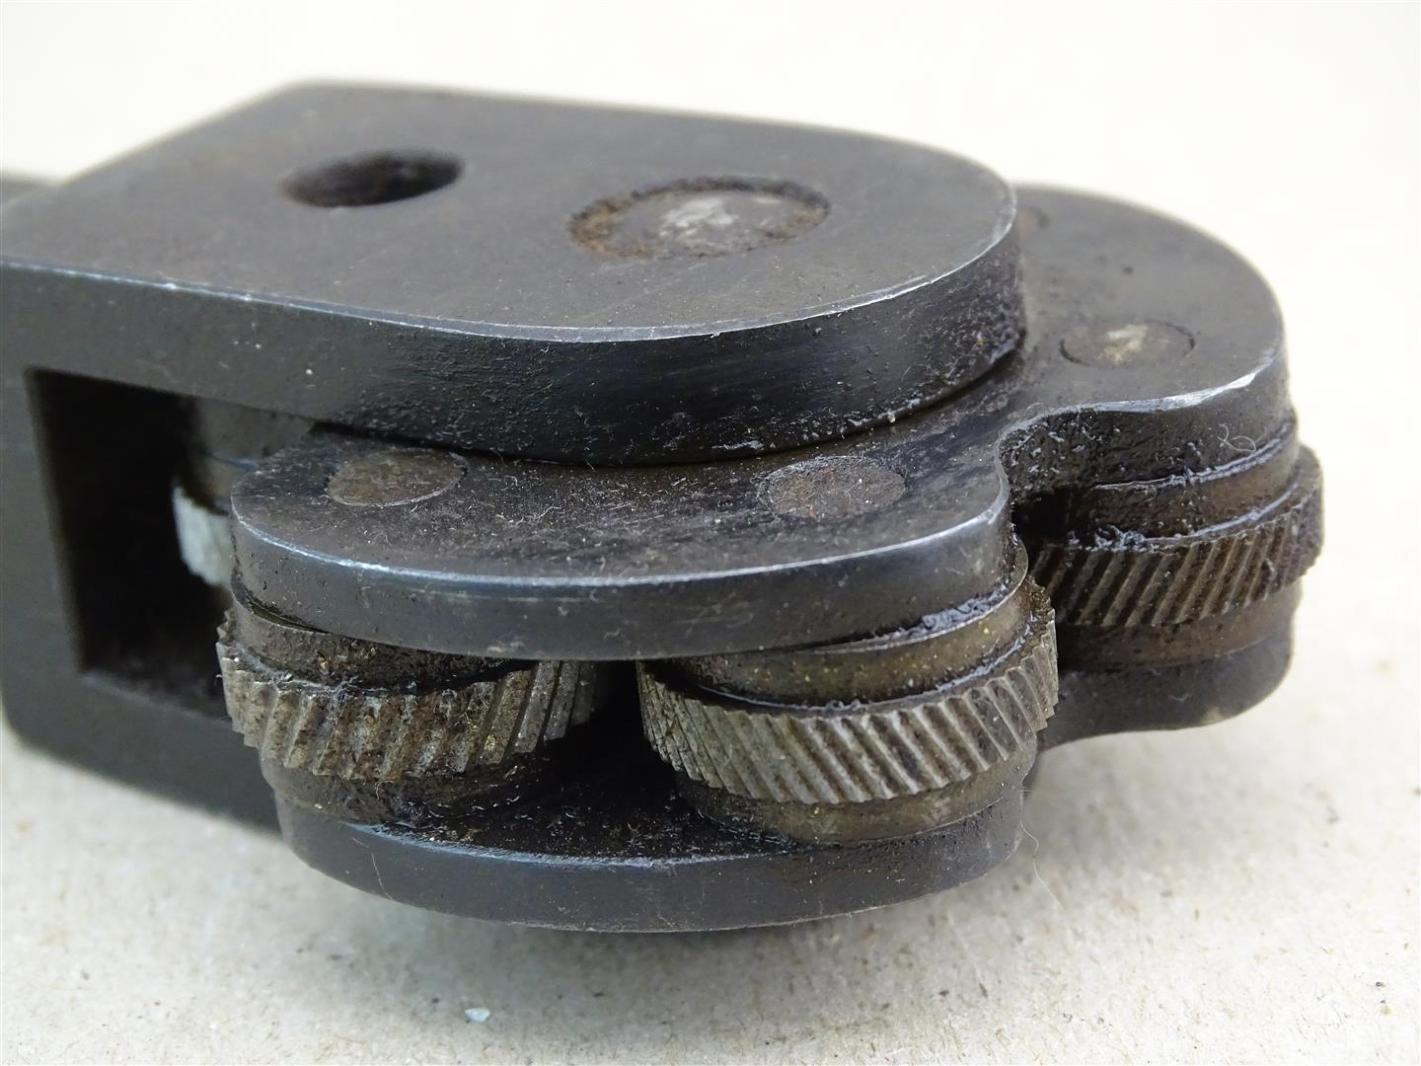
Knurling Wheels are the part of the tool that actually makes the pattern. There are a few types:
● Straight Wheels: Used for Straight Knurling, creating lines around the part.
● Diagonal Wheels: Great for Diamond Knurling, making a criss-cross pattern.
● Helical Wheels: These are for Helical Knurling, making a spiral pattern.
Each type of wheel is chosen based on the desired pattern and Surface Finish.
Knurling Inserts: Functionality and Selection Criteria
Knurling Inserts are parts of the tool that hold the wheels. When choosing inserts, consider:
1. Material: Tough materials reduce Tool Wear.
2. Size and Shape: Match with the Workpiece and Knurling Wheel.
3. Type of Knurling: Different inserts for different patterns.
Correct selection is crucial to avoid Common Defects like Surface Damage.
Advancements in Knurling Tool Technology
Recently, there have been cool advancements in knurling tools:
● Push-Type and Floating Knurling Tools: These offer more flexibility and can adapt to uneven surfaces.
● Automated Systems: They improve precision and speed in the Knurling Process.
● Advanced Materials: New materials for wheels and inserts reduce wear and extend tool life.
These advancements help in achieving more Precise patterns with fewer Chattering or Vibration Marks. Remember, the right tool and technology make all the difference in creating high-quality, Textured surfaces.
Measuring Knurling Dimensions
Understanding Knurling Measurements
Measuring in knurling is key to getting it right. It's like measuring for a new piece of furniture – accuracy is everything. Knurling Tools are used to create patterns on Machined Parts. But before and after using these tools, we need to measure. This ensures the Knurling Process meets the design requirements and avoids Common Defects.
How to Measure Diameter Before and After Knurling
1. Before Knurling: Use a caliper to measure the original diameter of the Workpiece.
2. After Knurling: Measure again. The diameter usually increases because the pattern adds material to the surface.
This change in size is critical, especially for parts that need to fit precisely with others.
Analyzing Knurling Angle and Knurl Diameter
● Knurling Angle: This is the angle of the pattern on the part. For example, Straight Knurling has a different angle compared to Diamond Knurling.
● Knurl Diameter: This refers to the size of the Knurling Wheels or Inserts used. It affects how deep and wide the pattern is.
Proper analysis of these aspects ensures a Precise and Aesthetic finish. It's important to Carefully Prepare the Workpiece and select the right Knurling Tool for the desired outcome. Remember, a well-done knurl improves Grip and adds to the Surface Finish.
Types of Knurling Patterns

Different Knurling Patterns and Their Characteristics
Knurling patterns are like the fingerprints of the manufacturing world – each one unique and functional. Let's dive into some common types:
● Straight/Standard Knurl: This is the most basic pattern, creating straight lines along the axis of the Workpiece. It's often used for a simple, effective grip.
● Right-Handed Knurl: These patterns angle to the right. They are great for parts that will be turned clockwise.
● Left-Handed Knurl: The opposite of right-handed, these patterns angle to the left, ideal for counter-clockwise use.
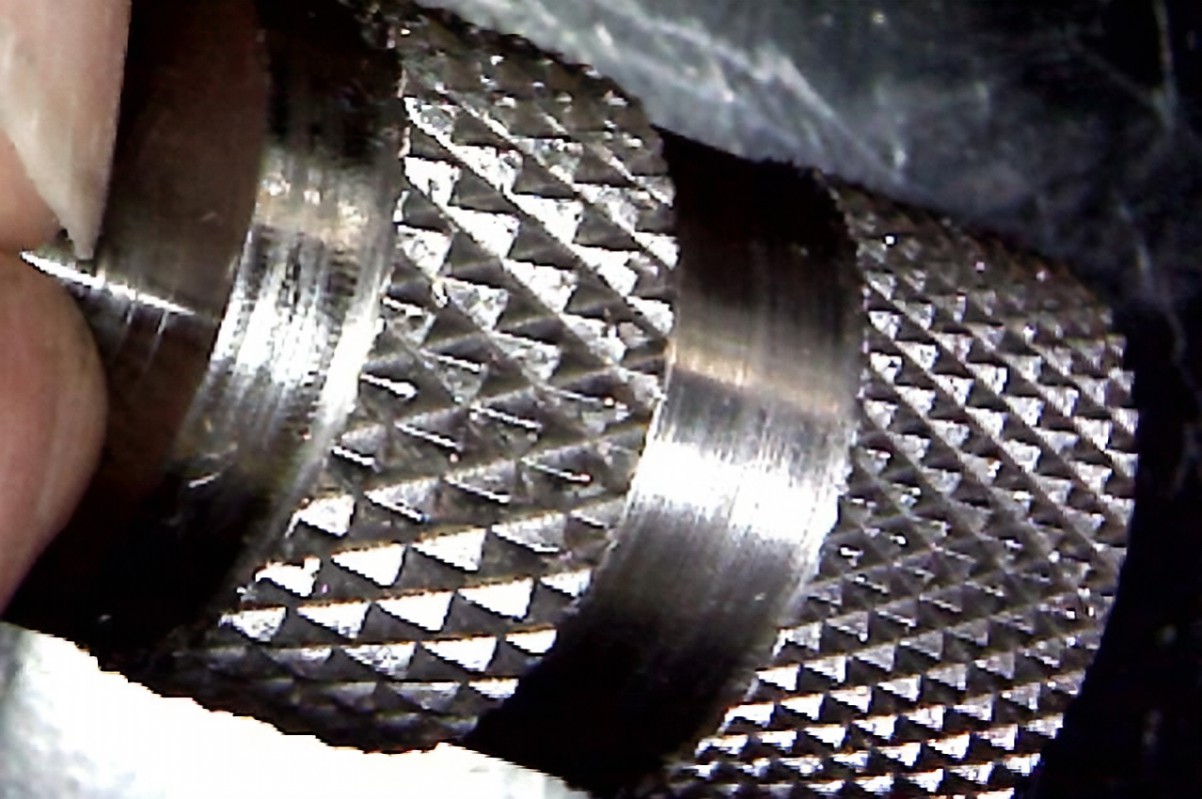
● Diamond Knurl: A classic choice, diamond knurls create a criss-cross pattern. They offer excellent grip and a visually appealing look.
● Concave and Convex Knurl: These patterns curve inward or outward, giving a unique feel and grip.
● Square and Beveled Knurl: They create square or angled patterns, often used for a decorative touch.
Comparative Analysis of Knurling Patterns
Each pattern serves a purpose. Let's compare:
● Grip: Diamond and standard knurls provide the best grip.
● Aesthetics: Square and beveled patterns are often chosen for their looks.
● Functionality: Right and left-handed knurls are chosen based on the direction of movement needed.
In the Knurling Process, choosing the right pattern is crucial. It depends on the Application and desired Surface Finish. Whether you're using Knurling Wheels or Inserts, remember that each pattern has its strengths. For Precise work, Carefully Prepare the Workpiece and Choose the Appropriate Knurling Tool. This ensures a great outcome, free of Common Defects like Poor Pattern Definition or Surface Damage.
Materials Suitable for Knurling
Metals and Their Suitability for Knurling
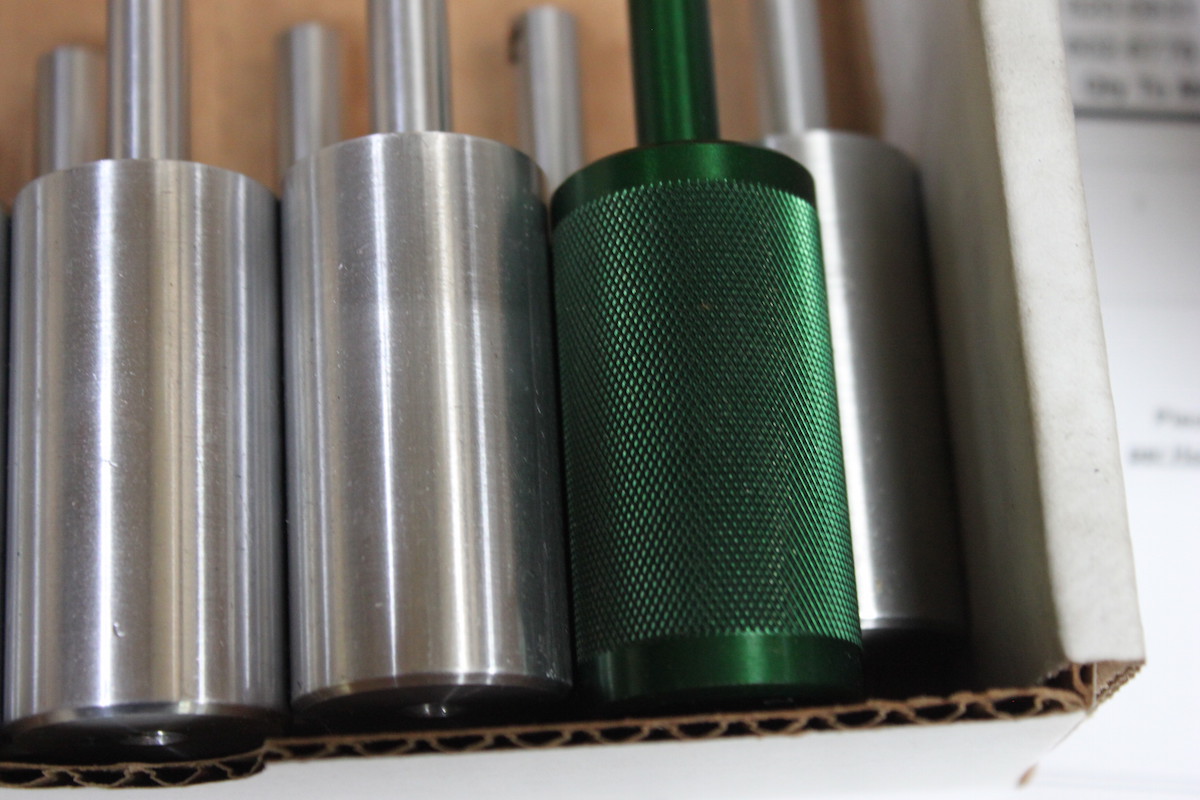
Knurling loves metals. Most Machined Parts for knurling are metal. Why? Because metals are tough and hold patterns well. Here are some top picks:
● Aluminum: Easy to knurl, great for lightweight parts.
● Steel: Harder than aluminum, perfect for heavy-duty parts.
● Brass: Soft, easy to knurl, and looks shiny.
Each metal reacts differently in the Knurling Process. The key is to Carefully Prepare the Workpiece and use the right Knurling Tools.
Knurling with Plastics: Challenges and Techniques
Plastics are trickier. They're softer and can deform. But it's not impossible. Here's how to knurl plastics:
1. Low Pressure: Use less force to avoid Surface Damage.
2. Cool Temperatures: Too much heat can melt plastic. Keep it cool.
3. Sharp Tools: Dull tools can drag and damage the plastic.
With these tips, you can create Textured plastic parts with Precise patterns.
Knurling in Woodworking: Possibilities and Limitations
Wood is an uncommon choice for knurling, but it's possible. The challenges are:
● Softness: Wood can split or chip.
● Grain: The grain of the wood affects the pattern.
For woodworking, use sharp Knurling Tools and go slow. This minimizes Tool Wear and Surface Damage.
In summary, whether it's metal, plastic, or wood, the right Materials and Knurling Techniques make all the difference. Remember to Choose the Appropriate Knurling Tool and control the Optimal Cutting Speed for best results. Each material has its unique Characteristics and Applications in the world of knurling.
Knurling Applications in Various Industries
Industrial Applications
In the industrial world, Knurling is a big deal. It's used on Machined Parts like tools and machine components. Why? For better Grip and Precision. Here's where you'll see it:
● Tool Handles: For a non-slip grip.
● Mechanical Parts: Where precision and grip are key.
Consumer Products
Look around your house. Knurling is there too. Think of:
● Kitchen Gadgets: Like knobs on stoves.
● Sports Equipment: For that extra grip.
Medical and Aerospace Uses
Here, knurling is all about safety and precision. It's found in:
● Surgical Tools: For steady, slip-free operations.
● Aerospace Components: Where every millimeter matters.
Use of Knurling in Manufacturing and Machinery
In manufacturing, Knurling is everywhere. It's on:
● Dials and Switches: For easy, accurate control.
● Machine Parts: To ensure they fit just right.
Knurling in Consumer Electronics: Enhancing Functionality and Aesthetics
Your gadgets have knurling too. It's used to:
● Improve Grip: On things like cameras.
● Add a Cool Look: Making gadgets not just work well, but also look good.
The Role of Knurling in Jewelry and Art
Knurling isn't just functional; it's beautiful too. Jewelers use it to:
● Add Texture: To rings and bracelets.
● Create Unique Patterns: Making each piece special.
Knurling in Repair and Maintenance Work
For repair jobs, knurling is crucial. It helps with:
● Better Tool Handling: So wrenches don't slip.
● Durability: Making parts last longer.
In every industry, Knurling Tools and processes are vital. They make products safer, easier to use, and even more beautiful. Whether it's in High-Precision Fields like aerospace or something as common as a kitchen tool, knurling plays a part in making our world work better.
Technological Advancements in Knurling
Innovations in Knurling Tools and Machinery
The Knurling Process has seen some cool changes recently. New tools and machines make knurling smarter and easier. Here's what's new:
● Advanced Knurling Wheels: These wheels are tougher and last longer.
● Precision Knurling Inserts: They allow for more detailed patterns.
● Automated Knurling Machines: These machines do the job faster and with less error.
These innovations mean Machined Parts look better and work better.
The Intersection of Knurling and Nanotechnology
Nanotech is like a mini superhero in knurling. It's all about working on a super small scale. This means:
● Super Precise Patterns: We're talking tiny, detailed knurling.
● Materials That Last Longer: Nanotech makes materials stronger.
● Tiny Tools for Tiny Jobs: Perfect for small or delicate parts.
Future Trends: Automation and Precision in Knurling
Looking ahead, knurling is getting even smarter. Here's what to expect:
● More Automation: Machines will do more of the work.
● Even Better Precision: Expect even more detailed patterns.
● Smart Tools: Tools that adjust themselves for the perfect knurl.
In short, knurling is not just about putting lines on metal anymore. It's about using technology to make things that are precise, durable, and look great. Whether it's in your car, your phone, or even your jewelry, knurling is there, and it's getting better all the time.
Common Defects in Knurling Operations
Identifying and Addressing Size Issues
Size matters in knurling. Under or Over Size parts are common issues. Here's what to do:
● Measure Before and After: Always check the size of your Workpiece before and after knurling.
● Adjust Tool Pressure: Too much pressure can increase size. Less pressure might reduce it.
Getting the size right is crucial for parts that need to fit perfectly.
Surface Damage and Its Prevention
Nobody wants a scratched or damaged part. Surface Damage can be a headache. To prevent it:
● Use Sharp Tools: Dull tools can harm the surface.
● Control Speed: Too fast can lead to mistakes. Go slow and steady.
● Apply Lubrication: This reduces friction and damage.
Taking care of these can keep your parts looking great.
Addressing Tool Wear and Maintenance
Tool Wear affects quality. To keep tools in top shape:
● Regular Checks: Always inspect your Knurling Tools.
● Proper Storage: Keep them clean and safe when not in use.
● Replace When Needed: If a tool is worn out, it's time for a new one.
Good tool maintenance means fewer problems down the line.
Ensuring Pattern Definition and Consistency
The pattern needs to be just right. For Precise Pattern Definition:
● Consistent Pressure: This keeps the pattern even.
● Right Tool for the Job: Different patterns need different tools. Choose the Appropriate Knurling Tool.
● Watch for Chattering or Vibration Marks: These can mess up your pattern. Keep everything stable.
A perfect pattern means a part not only does its job but also looks good doing it. Remember, in knurling, the details make all the difference. Whether it's a simple Straight Knurling or a more complex Diamond Knurling, every step matters to avoid these common defects.
Best Practices for Optimal Knurling Finishes
Preparing the Workpiece for Knurling
First things first, Carefully Prepare the Workpiece. Here's how:
● Clean the Surface: Any dirt or oil can mess up the knurling.
● Check the Size: Make sure it's the right size for your knurling tool.
● Inspect for Defects: Any pre-existing damage can get worse with knurling.
A well-prepared workpiece is the first step to a perfect finish.
Selecting the Right Knurling Tool
Choosing the right tool is crucial. Here's what to consider:
● Type of Knurl: Straight, Diamond, Helical? Each needs a different tool.
● Material of the Workpiece: Softer metals need different tools than harder ones.
● Size of the Pattern: Bigger or smaller patterns require different Knurling Wheels or Inserts.
The right tool makes all the difference.
The Role of Lubrication in Knurling
Lubrication is key. It helps by:
● Reducing Friction: Less friction means less Surface Damage.
● Improving Tool Life: Lubrication helps prevent Tool Wear.
● Enhancing Pattern Quality: A smoother operation leads to better patterns.
Always Apply Lubrication before starting.
Setting Optimal Cutting Speeds
Speed is important. Here's why:
● Too Fast: You risk poor pattern quality and more wear.
● Too Slow: It can take too long and may not form the pattern well.
● Just Right: It ensures a clean, consistent pattern.
Find the Optimal Cutting Speed for your specific task.
Balancing Tool Pressure for Perfect Finishes
Last but not least, the pressure:
● Too Much Pressure: It can deform the workpiece or cause tool damage.
● Too Little Pressure: The pattern might not form correctly.
● Balanced Pressure: Leads to a perfect, consistent pattern.
Balancing the pressure is essential for that perfect knurl.
Remember, every step in the Knurling Process contributes to the final look and feel of the product. From the initial preparation to the final pressure applied, each element plays a role in achieving a Precise, Textured, and Aesthetically Pleasing knurled surface. Whether it's for practical Grip or enhancing the Surface Finish, following these best practices will help ensure top-notch results in your knurling projects.
Conclusion
In this comprehensive guide, we've delved into the multifaceted world of knurling, a pivotal process in modern manufacturing. From its historical roots, where the term evolved from 'knur' to the now commonly used 'knurled', to the intricate principles that define the knurling operation, we've covered the expansive journey of this technique.
We've explored the basic principles of knurling, detailing the knurling operation and the equipment used, such as knurling wheels and inserts. Each tool plays a crucial role, and advancements in their technology continually enhance the process. A deep dive into the methods, distinguishing between rolling and cutting knurling, provided a practical, step-by-step guide to mastering the knurling process.
Understanding measurements in knurling – from diameter changes pre and post-process to analyzing angles and knurl diameters – has been essential in achieving precision. We've also looked at various knurling patterns, their unique characteristics, and how they compare in different applications.
The article highlighted knurling's versatility across materials, including metals, plastics, and even wood, each presenting unique challenges and techniques. This versatility extends to its applications in diverse industries – from industrial components and consumer products to its critical use in medical, aerospace, and consumer electronics, not to mention its artistic expressions in jewelry and art.
Technological advancements have been a focal point, where the intersection of knurling with nanotechnology and trends towards automation and precision indicate a future where knurling continues to evolve and integrate with cutting-edge technologies.
Common defects in knurling operations, such as size issues, surface damage, tool wear, and pattern inconsistency, were discussed with solutions and best practices. These practices, including workpiece preparation, tool selection, lubrication, optimal cutting speeds, and balanced tool pressure, are pivotal for achieving perfect finishes.
Reflecting on knurling's current and future role in various industries, it's evident that this process is not just a manufacturing technique but an art form that blends functionality with aesthetics. As technology advances, knurling will continue to play a critical role in manufacturing, pushing boundaries in precision, design, and efficiency. This guide has aimed to equip readers with a thorough understanding of knurling, ensuring they're well-prepared to apply these principles and techniques in their professional endeavors.
FAQ
Q: Why is Knurling Essential in Manufacturing?
A: Knurling creates textured patterns on parts. Enhances grip for hand-operated components. Used for aesthetic and functional purposes.
Q: What Are the Common Machines Used for Knurling?
A: Lathes and CNC machining most common. Specialized knurling tools also used. Can be integrated into production lines.
Q: How to Determine the Right Cutting Speed for Knurling?
A: Material type dictates speed. Manufacturer's guidelines provide starting point. Trial and error fine-tunes the process.
Q: Tips for Choosing the Appropriate Knurling Technique for Different Materials
A: Consider material hardness and ductility. Select pattern based on desired grip. Adjust pressure and speed accordingly.
Q: How do hand knurling and machine knurling differ in precision and application?
A: Machine knurling more precise, consistent. Hand knurling offers portability, flexibility. Machines preferred for high-volume production.


