Countersink holes are essential in engineering and construction, ensuring fasteners sit flush with the surface. From cellphones to industrial equipment, countersinking plays a key role in machining metal, wood, and sheet metal.
This article will explore what countersink holes are, their uses, and how to apply ANSI standards to create precise, flush finishes in manufacturing. Learn about the tools, techniques, and applications that make countersink holes vital in various industries.
What is a Countersink Hole?
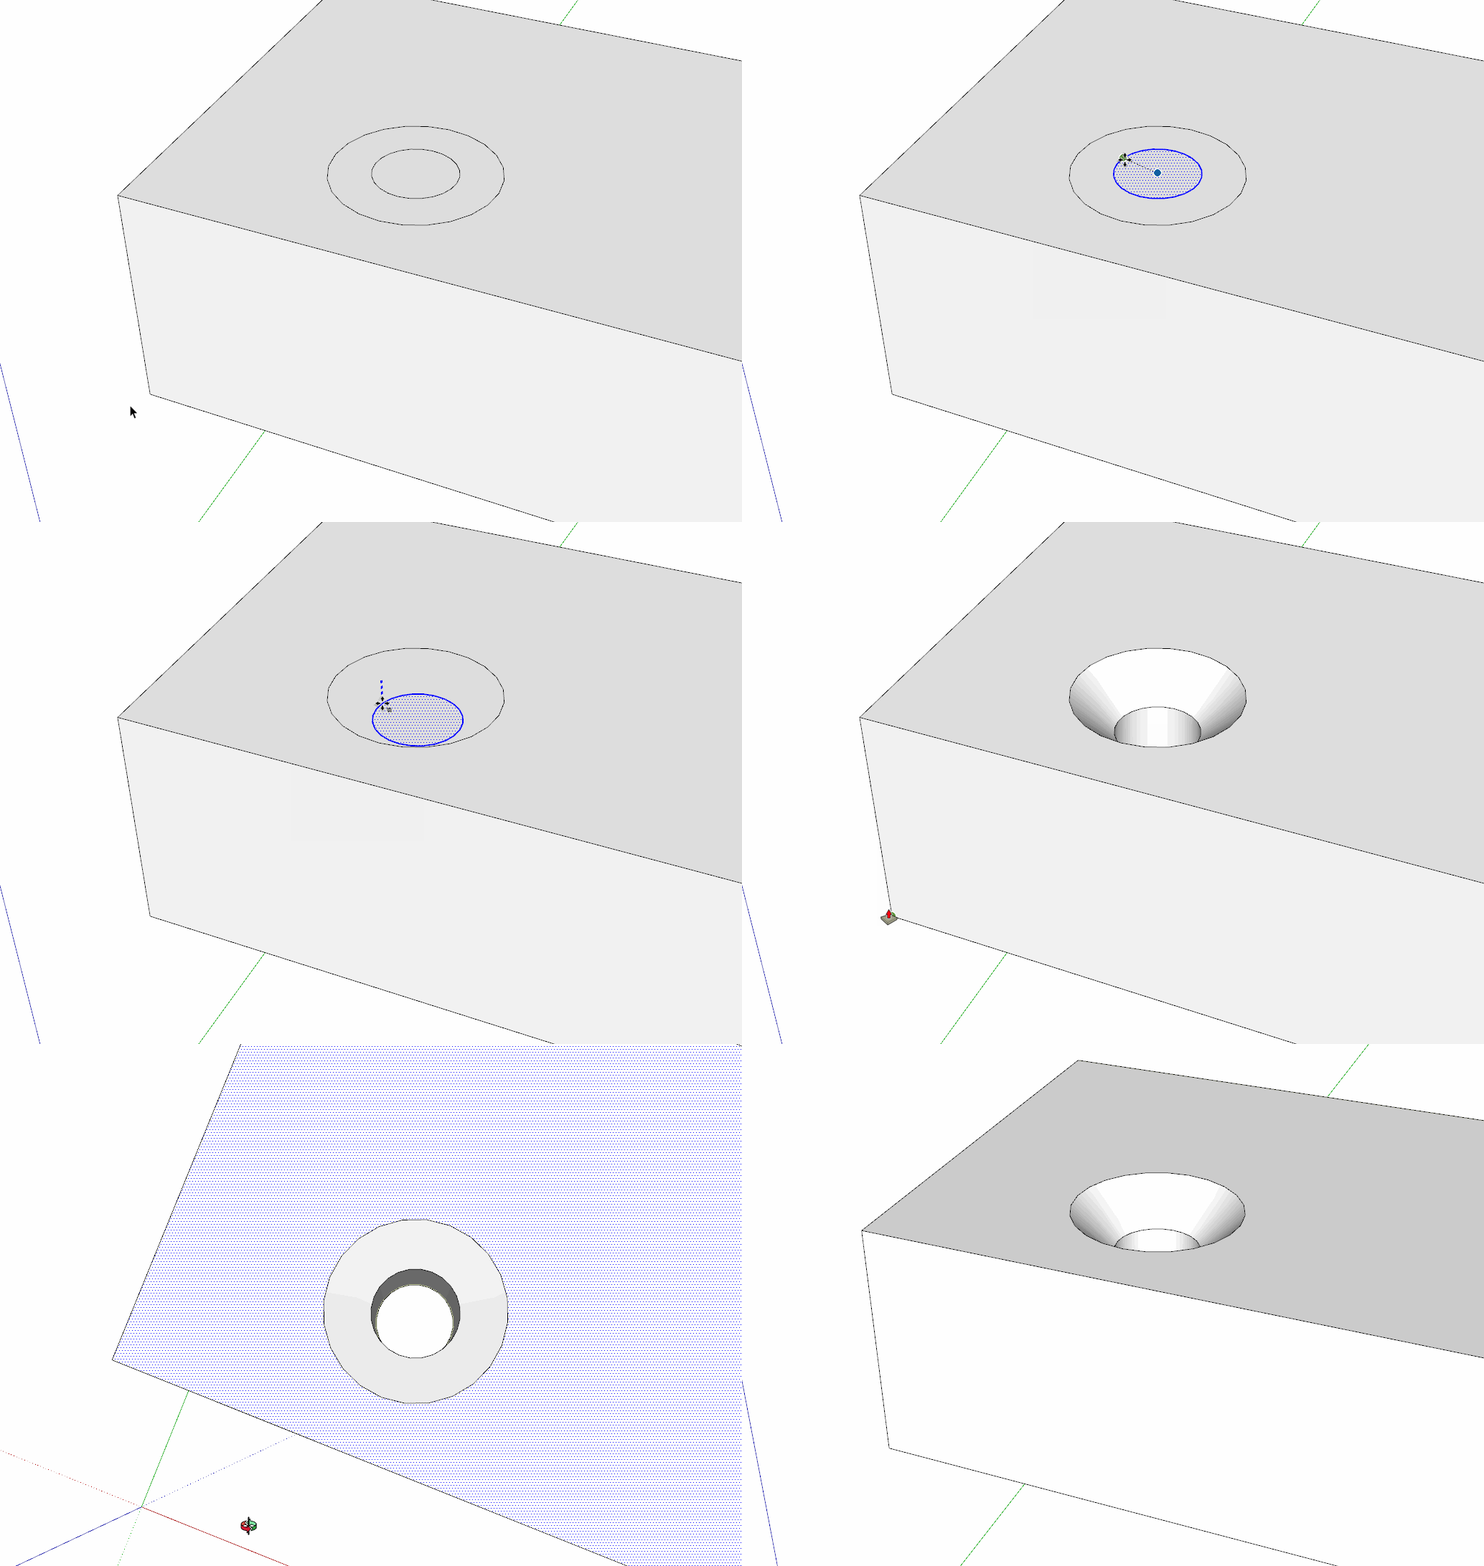
A countersink hole is a conical-shaped recess at the top of a drilled hole. Its purpose is to allow fasteners, like flathead screws, to sit flush or just below the surface. This design enhances both the aesthetics and functionality by reducing the risk of snags or damage.

Difference Between Countersink and Counterbore
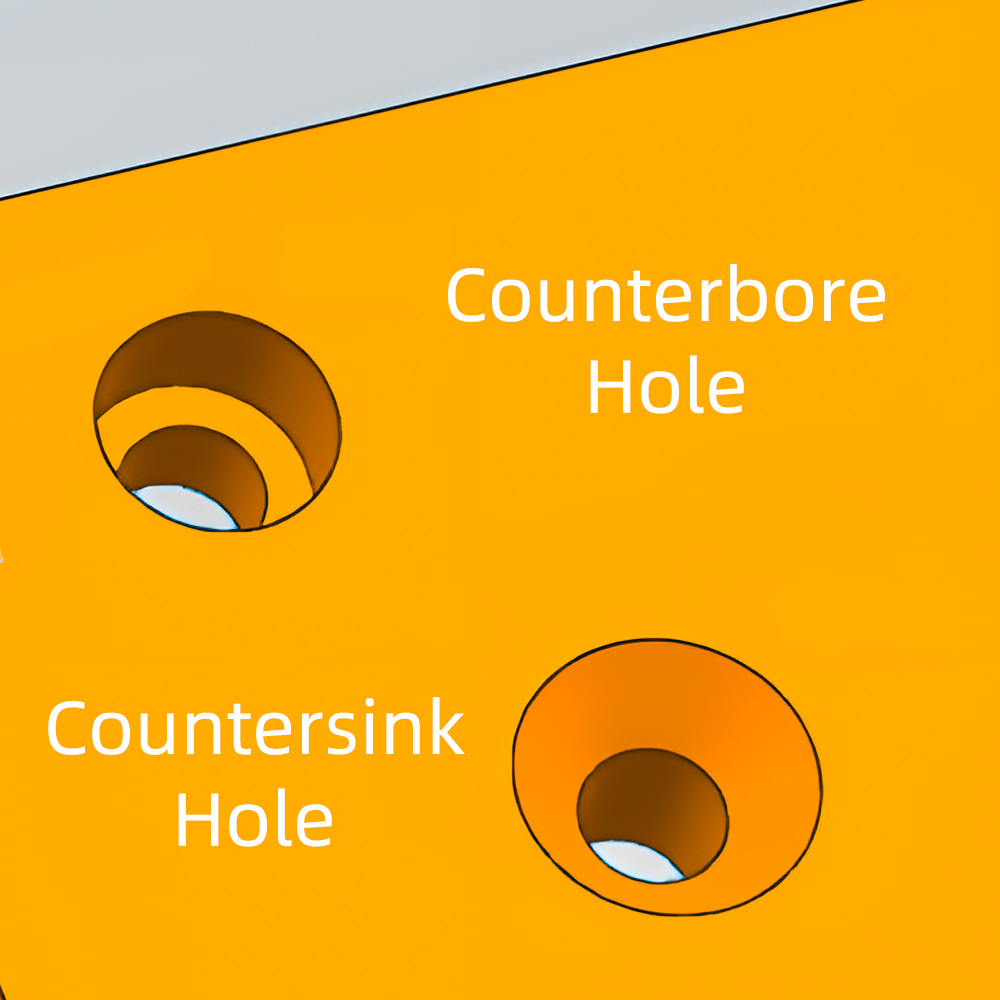
A countersink creates a conical opening, while a counterbore creates a cylindrical recess. The counterbore is used when the screw head needs to be flat and below the surface, often with socket cap screws. On the other hand, countersinks are ideal for fasteners with conical heads, ensuring a smooth finish. For a more detailed comparison, you can refer to our guide on counterbore vs spotface holes.
| Feature | Countersink | Counterbore |
| Shape | Conical | Cylindrical |
| Use | Flathead screws, rivets | Socket cap screws |
| Surface Finish | Flush or sub-flush | Flush only |
Below is a visual showing the differences between a countersink and counterbore:

Key Components of a Countersink Hole
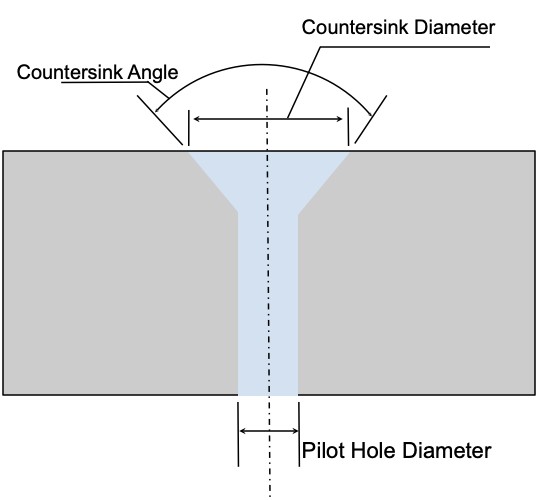
Countersink Diameter
The diameter of the countersink should be larger than the fastener's head to ensure it sits flush. Engineers determine the appropriate size based on the screw head dimensions and the material being used.
Countersink Angle
Countersink angles vary depending on the fastener type. Common angles include 82° for ANSI/Imperial fasteners and 90° for metric fasteners. It's important to match the fastener's head angle to the countersink angle for optimal fit.
Pilot Hole Diameter
The pilot hole diameter is crucial for ensuring the fastener fits properly. The diameter is usually determined by the screw shank size and desired clearance. The pilot hole must be drilled precisely, as it dictates the overall performance and fit of the fastener in the assembly. For more information on different types of holes in engineering, check out our comprehensive guide on different types of holes in engineering.
Types of Countersink Angles
Countersink angles vary depending on the application and fastener type. Choosing the correct angle ensures fasteners sit flush with the surface, preventing damage and improving aesthetics. Below are standard countersink angles and their uses across different industries.
60° for Deburring
The 60° countersink angle is commonly used for deburring. It removes sharp edges or burrs from drilled holes, ensuring smoother finishes. This angle is not typically used for fastening but is crucial for preparing surfaces for other operations.
82° for Imperial Countersunk Screws (US Standard)
In the U.S., the 82° angle is the standard for imperial countersunk screws. It's widely used in industries like metalworking and woodworking where screws need to sit flush. This angle provides a snug fit for flathead screws, ensuring secure fastening and a clean appearance.
90° for Metric Countersunk Screws
For metric fasteners, the standard countersink angle is 90°. This is common in international manufacturing and is used for projects requiring precise fits, particularly in electronics and automotive applications. It ensures uniformity across different regions and industries.
| Angle | Use | Application |
| 60° | Deburring | Metal surfaces, preparing for fastening |
| 82° | Imperial countersunk screws (US) | Woodworking, metalworking |
| 90° | Metric countersunk screws | Electronics, automotive |
100° for BA Screws
The 100° angle is used for British Association (BA) screws. These screws are common in older machinery and precision devices. The wider angle helps provide a larger contact area, ensuring better fastening on delicate or small parts.
120° for Sheet Metal Rivets
120° countersinks are designed for sheet metal rivets. These fasteners are often used in construction and aerospace, where a stronger, more durable connection is needed. The wider angle helps the rivet sit flush and prevents it from damaging thin metal sheets. For more information on rivets and their applications, see our article on rivets.
For more detailed information on manufacturing processes that involve creating precise holes and other features, you might be interested in our guide on CNC precision machining.
Common Fasteners Used with Countersink Holes
Countersink holes are designed to work with specific fasteners, ensuring a smooth, flush surface. The most common fasteners used include flathead screws and rivets. Matching the fastener type to the correct countersink hole dimensions is key to achieving both a secure fit and a clean finish.
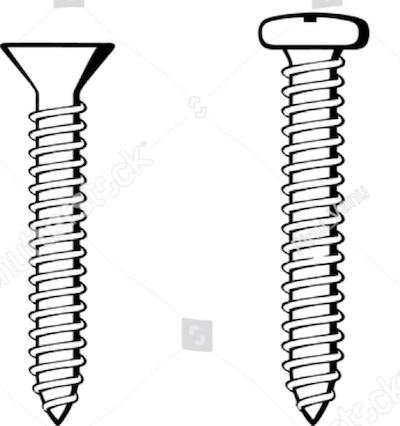
Flathead Screws: These screws have a conical head that fits perfectly in countersink holes, allowing them to sit flush or sub-flush.
Rivets: Used in various industries, rivets are often paired with countersink holes for permanent fastening, especially in aerospace and electronics. For more information on rivets and their applications, see our article on rivets.
| Fastener Type | Common Application | Countersink Angle |
| Flathead Screws | Woodworking, metalworking | 82° (US), 90° (metric) |
| Rivets | Aerospace, electronics | 120° (for sheet metal) |
Flathead Screws
Flathead screws are one of the most common fasteners used with countersink holes due to their ability to create a flush or recessed surface. The flat conical shape of the screw head fits perfectly into the conical countersink hole, eliminating any protrusion.
Advantages of Using Flathead Screws with Countersink Holes
Flathead screws provide a clean, smooth finish that prevents snags or interference. They are ideal for high-contact surfaces like machine parts, cabinetry, and electronics. This type of fastener is often used where aesthetics and safety are a priority.
How to Ensure a Flush Finish
To achieve a flush finish, it’s crucial to match the screw head’s angle to the countersink hole’s angle. For example, use an 82° countersink for imperial fasteners and a 90° for metric fasteners. Properly drilling the pilot hole and setting the correct depth also ensures the screw sits perfectly flush.

Other Fastener Types
Rivets
Rivets are often used with countersink holes in industries where a permanent fastening solution is needed. In aerospace, rivets are used to secure metal sheets without protruding heads, which reduces drag. They are also popular in electronics, where components must sit flush with the casing.
Non-Threaded Fasteners
Various non-threaded fasteners, like quarter-turn locks and other knock-down fasteners, are also compatible with countersink holes. These are often used in applications that require frequent assembly and disassembly, such as furniture or equipment housing.
Rivets and other specialized fasteners benefit from the use of a wider countersink angle, such as 120°, especially in sheet metal applications, ensuring a secure and smooth connection. For more information on sheet metal types and their applications in fabrication, you might be interested in our article on sheet metal types you can use in fabrication.
When working with these fasteners and countersink holes, precision is key. For high-precision manufacturing processes, you might want to explore our CNC precision machining services, which can ensure accurate and consistent production of parts with countersink holes and other features.
Manufacturing Countersink Holes
Manufacturing countersink holes requires precision and the right tools to ensure fasteners sit flush or below the surface. The process involves selecting the correct tools and following proper steps for each material type, whether it's metal, wood, or plastic. For high-precision manufacturing, CNC precision machining can be an excellent option.
Tools and equipment for countersinking
Step-by-step process for drilling countersink holes
Drill the pilot hole using a standard drill bit slightly smaller than the screw diameter.
Select the correct countersink angle based on your screw type (e.g., 82° for imperial, 90° for metric).
Choose a countersink bit with the appropriate angle and diameter for your screw size.
Set the depth stop on your drill or use a depth gauge to ensure consistent depth.
Drill the countersink slowly and steadily, applying light pressure.
Inspect the result to ensure the screw sits flush with the surface.
For more information on different types of holes and their applications, check our guide on different types of holes in engineering.

Tips for precise and consistent countersinking
Use a drill press for better control and accuracy.
Start with a slow speed and increase gradually to prevent chatter.
Apply a small amount of cutting fluid when countersinking metals.
For large batches, use a countersink with a pilot to maintain consistency.
Techniques for countersinking different materials
Metals (steel, aluminum, etc.)
Use HSS or carbide countersink bits for best results.
Apply cutting fluid to reduce heat and improve tool life.
Adjust speed and feed based on the metal's hardness.
For more information on working with different metals, you might find our article on titanium vs. aluminum helpful.
Plastics
Use sharp, high-speed countersink bits to avoid melting the plastic.
Apply light pressure and clear chips frequently.
Consider using a step drill bit for better control in thin plastics.
Wood
Use a wood-specific countersink bit with a steeper angle (around 70°).
Drill at high speed with light pressure to prevent splitting.
For hardwoods, pre-drill the pilot hole to avoid tear-out.
Advantages and Disadvantages of Countersink Holes
Advantages
Flush and Neat Appearance
Countersink holes allow fasteners like flathead screws to sit flush or below the surface, creating a clean, professional look. This is especially useful in applications like furniture and electronics, where appearance matters.
Concealment of Fasteners
With countersink holes, fasteners can be easily concealed, improving aesthetics. In woodworking, for instance, screws can be covered with putty and stained over, making them nearly invisible.
Reduced Risk of Damage or Injury
By ensuring fasteners sit flush, countersink holes minimize the risk of damage or injury from protruding screw heads. This is crucial in machinery or devices where exposed screws could snag clothing or cause injuries.
Improved Load Distribution and Stress Reduction
Countersink holes help spread the load of a fastener more evenly across the surface. This reduces the concentration of stress, preventing cracks or failure. In contrast, straight holes tend to concentrate stress around the screw head, increasing the likelihood of damage over time.
| Hole Type | Load Distribution | Stress Concentration |
| Countersink Hole | Even | Lower |
| Straight Hole | Uneven | Higher |
Disadvantages
Requirement of Specialized Tools and Skills
Countersinking requires specialized tools like countersink drill bits and deburring tools. Not all standard drills can create accurate countersink holes. Skilled operators are often needed to ensure precision.
Reduced Strength Compared to Straight Holes
Countersink holes, while improving aesthetics and safety, slightly reduce the structural strength of the fastener. The conical shape may provide less contact area compared to straight holes, leading to less load-bearing capacity in certain applications.
Challenges in Achieving Precision
Hard materials like stainless steel or titanium can make it difficult to achieve precise countersink holes. Specialized, high-quality tools are required to avoid damaging the material, and the process can be time-consuming.
Higher Manufacturing Costs
Due to the need for precision tools and skilled labor, countersinking often increases manufacturing costs. This can be a factor in large-scale production where time and budget constraints are important.
Applications of Countersink Holes in Various Industries
Countersink holes have a wide range of applications across different industries, offering both aesthetic and functional benefits. They ensure fasteners sit flush, reduce drag, and provide smooth surfaces that improve both appearance and performance.
Aerospace
Flush Surfaces for Reduced Aerodynamic Drag
In aerospace, smooth surfaces are critical to reduce drag. Countersink holes ensure fasteners sit flush, minimizing turbulence and improving fuel efficiency.
Stress Reduction in High-Stress Areas
Countersunk fasteners distribute stress more evenly in high-stress areas, reducing the chance of material fatigue and improving safety in aircraft construction.
For more information on aerospace manufacturing, check out our guide on Aerospace Parts and Components Manufacturing.
Automotive
Attaching Body Panels for a Smooth Finish
In the automotive industry, countersink holes are used to attach body panels securely without compromising the vehicle's exterior finish. This ensures both aesthetic appeal and aerodynamic performance.
Interior Assembly Without Compromising Design
Inside the car, countersunk fasteners are used to assemble components while maintaining a sleek, uninterrupted design. It allows for smooth surfaces in areas frequently touched by passengers.
Learn more about automotive manufacturing in our article on Automotive Parts and Components Manufacturing.
Manufacturing and Assembly
Enhanced Aesthetics in Consumer Products
Countersink holes are frequently used in consumer products to conceal fasteners, ensuring a polished, professional appearance. This is particularly important in high-end goods where aesthetics play a major role.
Smooth Operation of Moving Parts
In machinery, countersink holes prevent fastener heads from interfering with moving parts. This improves safety and prolongs the lifespan of equipment by avoiding mechanical wear.
For precision manufacturing techniques, explore our CNC precision machining services.
Electronics
Maintaining Smooth Outer Surfaces in Device Enclosures
Electronics like smartphones and laptops rely on countersink holes to ensure fasteners are flush with the outer surface, providing both a sleek design and improved ergonomics.
Mounting Components on PCBs
In printed circuit boards (PCBs), countersunk screws are used to secure components without disturbing other layers. This helps ensure the longevity and reliability of electronic devices.
Construction
Furniture Manufacturing
Creating Flush Joints and Concealing Fasteners
Countersink holes allow furniture makers to create smooth, flush joints while concealing screws. This results in a cleaner, more professional look, especially in high-end furniture.
Enhancing Overall Aesthetics of the Product
Concealing fasteners with countersink holes improves the visual appeal of furniture, creating a seamless finish that highlights the craftsmanship.
Marine Industry
Reducing Drag and Maintaining Smooth Hull Surfaces
Similar to aerospace, the marine industry uses countersink holes to reduce drag. By ensuring fasteners sit flush on hull surfaces, boats and ships can move more efficiently through water.
Preventing Corrosion by Concealing Fasteners
Concealing fasteners in marine environments reduces the risk of corrosion, extending the life of the vessel and ensuring better performance in harsh conditions.
| Industry | Benefits of Countersink Holes |
| Aerospace | Reduced drag, stress reduction |
| Automotive | Smooth finish, seamless assembly |
| Manufacturing | Enhanced aesthetics, smooth operation |
| Electronics | Smooth surfaces, flush component mounting |
| Construction | Flush finish, safety, concealed fasteners |
| Furniture | Flush joints, concealed fasteners, aesthetics |
| Marine | Reduced drag, corrosion prevention |
As you can see, countersink holes are fundamental to success across a wide range of industries. They offer functional advantages like improved performance and reduced stress, while also delivering aesthetic benefits that elevate the overall quality and appearance of products.
Countersink Hole Size Charts for Common Fasteners
When working with countersink holes, it's essential to choose the correct size based on the fastener you’re using. Both ANSI and ISO provide standardized size charts that help ensure proper fit and flush finishes. Here’s how to use these charts to match fasteners to the appropriate countersink dimensions.
ANSI Size Charts for Socket Flat Head Screws
The ANSI (American National Standards Institute) provides specific guidelines for countersink hole dimensions for imperial fasteners. These are commonly used in the U.S. for flat head screws, ensuring fasteners sit flush with the surface.
| Fastener Size (Thread) | Pilot Hole Diameter (Close Fit) | Pilot Hole Diameter (Normal Fit) | Pilot Hole Diameter (Loose Fit) | Countersink Diameter | Countersink Angle |
| #0 | 1/15 | 6/79 | 3/32 | 5/32 | 82° |
| #1 | 3/37 | 4/45 | 8/77 | 3/16 | 82° |
| #2 | 3/32 | 7/69 | 7/62 | 7/32 | 82° |
| #3 | 5/47 | 8/69 | 9/70 | 1/4 | 82° |
| #4 | 3/25 | 9/70 | 14/97 | 9/32 | 82° |
| #5 | 9/64 | 5/32 | 11/64 | 5/16 | 82° |
| #6 | 2/13 | 10/59 | 5/27 | 11/32 | 82° |
| #8 | 9/50 | 10/51 | 13/61 | 3/8 | 82° |
| #10 | 15/73 | 21/95 | 5/21 | 7/16 | 82° |
Table 1: ANSI Size Chart for Socket Flat Head Fasteners
| Fastener Size | Countersink Diameter | Countersink Angle |
| 1/4 | 9/16 | 82° |
| 5/16 | 5/16 | 82° |
| 3/8 | 5/16 | 82° |
| 7/16 | 29/32 | 82° |
| 1/2 | 1 | 82° |
| 5/8 | 5/4 | 82° |
| 3/4 | 3/2 | 82° |
| 7/8 | 7/4 | 82° |
| 1 | 2 | 82° |
| 9/8 | 5/4 | 82° |
| 5/4 | 3/2 | 82° |
Table 2: Countersinking Size by Thread Size (ANSI)
ISO Size Charts for Different Thread Sizes
For metric fasteners, the ISO (International Organization for Standardization) defines countersink sizes. These standards are widely used in global manufacturing, ensuring compatibility between fasteners across different countries.
| Thread Size (Metric) | Pilot Hole Diameter (Close Fit H12) | Pilot Hole Diameter (Normal Fit H13) | Pilot Hole Diameter (Loose Fit H14) | Countersink Diameter | Countersink Angle |
| M3 | 3.2 mm | 3.4 mm | 3.6 mm | 6.94 mm | 90° |
| M3.5 | 3.7 mm | 3.9 mm | 4.2 mm | 8.96 mm | 90° |
| M4 | 4.3 mm | 4.5 mm | 4.8 mm | 9.18 mm | 90° |
| M5 | 5.3 mm | 5.5 mm | 5.8 mm | 11.47 mm | 90° |
| M6 | 6.4 mm | 6.6 mm | 7.0 mm | 13.71 mm | 90° |
| M8 | 8.4 mm | 9.0 mm | 10.0 mm | 18.25 mm | 90° |
| M10 | 10.5 mm | 11.0 mm | 12.0 mm | 22.73 mm | 90° |
| M12 | 13.0 mm | 13.5 mm | 14.5 mm | 27.21 mm | 90° |
| M16 | 17.0 mm | 17.5 mm | 18.5 mm | 33.99 mm | 90° |
Table 3: ISO Size Chart for Metric Thread Sizes
How to Use Size Charts to Match Fasteners and Ensure Proper Fit
Using these size charts is simple. First, identify the size of the fastener you’re using (e.g., #6 or M4). Then, refer to the chart to find the correct pilot hole diameter, countersink diameter, and angle. Make sure to match the screw's head size to the countersink diameter to achieve a flush finish.
Here’s a step-by-step process:
Identify Fastener Size: Determine if you are using an imperial or metric fastener.
Check Pilot Hole Size: Use the chart to find the correct pilot hole diameter for the fastener.
Match Countersink Diameter: Ensure the countersink diameter is larger than the fastener head.
Use Correct Angle: Make sure the angle matches the fastener standard (82° for ANSI, 90° for ISO).
Designing Countersink Holes with CAD Software
When designing countersink holes in engineering projects, CAD software plays a crucial role in ensuring precision and adherence to standards. Many popular CAD programs provide built-in tools that simplify countersink hole design, ensuring that engineers can create accurate models efficiently.
Built-in Functionality for Creating Countersinks in CAD Programs
Modern CAD software, such as SolidWorks, AutoCAD, and Fusion 360, includes built-in tools for creating countersink holes. These tools allow engineers to quickly add standard countersinks to designs without manually calculating dimensions. In SolidWorks, for example, you can use the Hole Wizard to specify the diameter, angle, and depth of the countersink. This tool automatically adjusts the hole based on the selected fastener type, whether it follows ANSI or ISO standards.
| Software | Key Feature for Countersinks |
| SolidWorks | Hole Wizard for fast design |
| AutoCAD | 3D modeling and custom parameters |
| Fusion 360 | Integrated manufacturing tools |
Importance of Adhering to ANSI and ISO Standards
It’s essential to design countersink holes that adhere to ANSI or ISO standards. These standards dictate the correct angle and diameter for fasteners in different regions. For example, ANSI often uses an 82° angle for imperial fasteners, while ISO recommends a 90° angle for metric screws. By using CAD tools, designers can ensure that countersink dimensions match the fasteners, avoiding assembly issues during manufacturing.
| Standard | Countersink Angle |
| ANSI | 82° |
| ISO | 90° |
Tips for Properly Defining and Calling Out Countersink Features
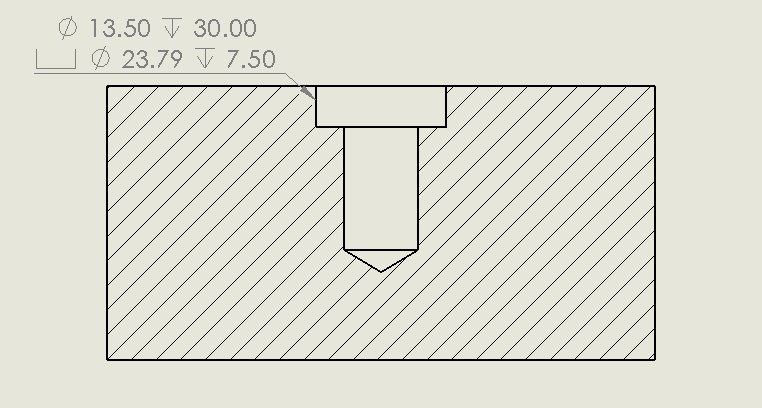
When designing countersink holes, it's important to define the features clearly on the drawing. CAD software allows you to specify the diameter, angle, and depth of the countersink in the design callouts. These features should be labeled using the appropriate symbols, like “V” for countersinks. Make sure to include all three dimensions (diameter, angle, and pilot hole) when creating drawings. This ensures that the manufacturer has all the information needed to drill the countersink hole accurately.

Here's an example of a proper countersink callout:
Ø10.0 ↧ 1.5 - 82°
This callout specifies a 10mm diameter hole with a 1.5mm deep, 82° countersink.
Use of GD&T symbols: Ensure correct use of GD&T (Geometric Dimensioning and Tolerancing) symbols to call out the countersink features.
Include tolerance information: When necessary, include bilateral or unilateral tolerances to account for any variances in manufacturing.
Conclusion
Countersink holes are essential in engineering and manufacturing for achieving flush finishes and reducing stress. Proper design, following ANSI or ISO standards, ensures fasteners fit securely. Using CAD software simplifies the design process, while professional manufacturing guarantees precision. For optimal results, always work with experienced manufacturers who understand the intricacies of countersinking.


