Have you ever wondered how aerospace engines achieve their remarkably precise cylindrical surfaces? Boring machining, a cornerstone of precision manufacturing, holds the answer.
In the realm of advanced manufacturing, boring operations stand as the gold standard for achieving exceptional hole accuracy and surface finish. From microscopic medical devices to massive industrial machinery, this sophisticated process enlarges and finishes pre-existing holes with tolerances as tight as ±0.0001 inches.
This comprehensive guide explores boring machining's principles, techniques, tools, and applications, offering insights into how this critical process shapes modern manufacturing precision.

What is Boring Machining?
Understanding Boring Operations
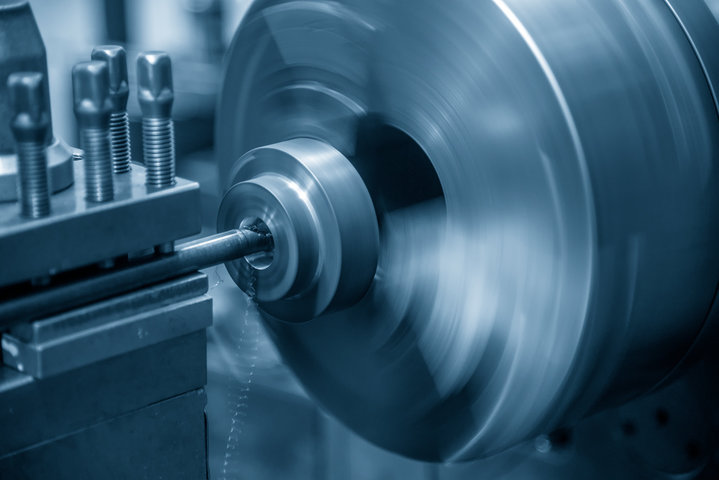
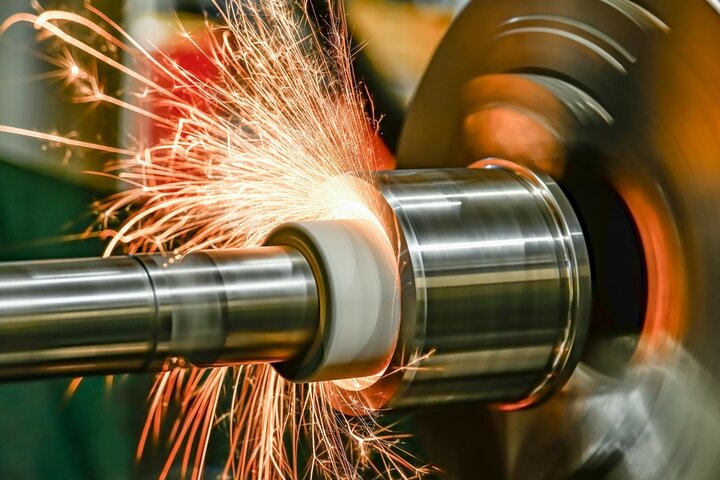
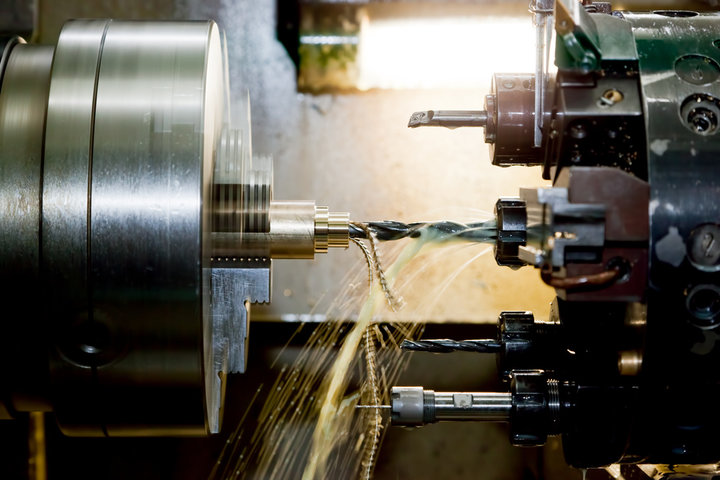
Boring machining- a text-book process of manufacturing and technological cutting of metals which is applied for finishing a hole in a workpiece or for back-working a hole. Material is removed gradually, accurately, and evenly from the internal surface of a pre-drilled hole by the cutting edges of the bore. Mechanized by a boring bar attached single-point cutting tool, the cutting tool is made to move progressively towards the workpiece and rotate at the same time to cut and achieve an accurate surface which is a cylinder retrofit.
During the process, the cutting edges act on the workpiece material while in motion using calculated speeds and feed, so as to machine helix wise as the edges advances in the hole. The present boring operations are integrated with computer numeric controlled (CNC) machining organisational structures that can arrange and control the movement within the machine of more than a single metal cutting tool, together with trailing each other in any direction and maintaining desired accuracy of diameter and out-of-roundness irrespective of distance from the axis.
Principles of Hole Enlargement
In operation of the borer, the geometric precision is maintained through the unwavering policy of removal of material with accuracy. Indeed, this requires ensuring balanced concentration of the cutting forces and the rigidity of the tool making the numerical value of the overhang ratio is rather significant for the precision. The cutting edge is directed to interact with the work material at the predetermined main cutting edge angle which affects chip flow and surface quality.
In relation to dimensional accuracy, the thermal stability of the tool and workpiece plays a significant roll. In medium and small scale tools, factors such as cooling systems help address the heat generated at the cutting interface, such is to prevent said thermal expansion and consecutive geometrical changes. Vibration control adds importance as the size of boring hole gets more, demanding reduction of cutting parameter, cutting condition and tool geometry to ensure suppression of vibrations and fulfil all the aesthetic conditions of the surface.

Why is Boring Machining Important?
The need for accuracy in manufacturing processes has made boring machining indispensable in current industry. The process provides the best finishes that reach as high as 16 micro inches Ra on the surface and precise up to ±0.0001inches in dimensions. This level of accuracy is instrumental in increasing the quality and performance of a product especially in critical uses such as production engine blocks and aero-engines. In addition, very tight form tolerance requirements are in place that reaches even the strictest form requirements far beyond DAEDO’s Form.
Types of Boring Machining
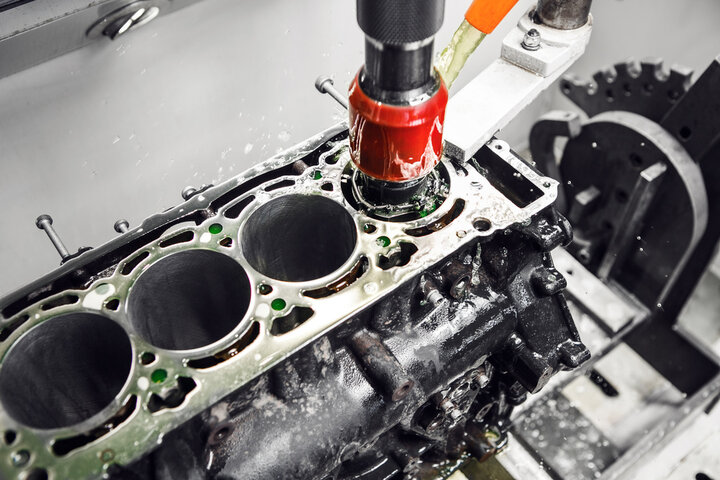
Cylinder Boring Machines
Cylinder boring machines allow for the reboring and honing of engine cylinder walls with precise cutting. These machining tools are supplied with an end-to-end boring bar that has cutting inserts embedded into it which are also provided with digital gauges to monitor surface refinements. Present-day models combine an indexing system for re-boring and heating/cooling systems for measurement of the temperature of the chambers in use, which allows for the attainment of extensive mirror finishes of Ra 15-20 micro inches while successfully keeping the bore straight all within 0.0001 inches.
Directional Boring Machines
Directional boring or directional drilling is the method of building tunnels like a bore in a very controlled manner, like without disturbing the headquarters. This method combines GPS with the guidance of the project and electronic tracking to work the head of the steerable bor. Advanced machines commonly used in directional boring drop the conventional cutting edges and introduce the drilling head that utilizes fluid jets to work. Also, a directionally drilled bore path is mapped by real-time bore path that effectively collects impressive volumes of site measurements. There can be varying parts of the unit from pipe rack to pipe storage and drilling which do not roman abandonment well of positions shared in the parent application.
Horizontal Boring Machine
Horizontal Boring is widely recognized as an effective method in the CNC machining discipline. Many features of this configuration include improved precision and reduced cycle time because of the nature of the horizontal spindle. For this application, boring success relies on the spindle orientation to ensure minimal deflection as the boring bar approaches the target. The table holds the workpiece in position with a fast rotation which is compatible of different positions latest forms of which are Facing, Grooving, or threading unless traditional boring. Thanztalisgrooving and threading are again traditional types boring.
Vertical Boring Machine
Vertical Boring technique uses vertical orientation of the spindle, and it’s widely used for processing large diameter cylindrical parts. Vertical Boring Mills are known as machines that are used to process workpiece that has a relatively large diameter, often in the range of several meters. One of the benefits that this configuration provides is that it uses gravity to stabilize the process in which the cutting operation is being carried out. This force is particularly welcomed where hardy products such as turbine casings or big valve bodies are being finished. The workpiece is usually placed on a horizontal table as the cutting tool descends straight downwards.
Jig Boring Machine
Jig Boring is the most advanced hole-making process. This special process enables the positioning accuracy of several micrometers with the use of high precision lead screws and state of the art measuring devices. Jig Boring Machines are equipped with high-precision spindles and strong rigidity to preserve such accuracy over a long machining cycle. Moreover, it is the go-to method for applications demanding specific hole positional and geometric relationships, for example in the production of dies and molds.
Line Boring Machine
Line Boring very efficiently takes care of facets involved with boring set of holes that has to be performed on an item kept in a single position. This is because its commercial use is quite common in applications like manufacturing of engine blocks as there are several bearing journals that must be aligned with high precision. Line Boring Bars are as long as the part and therefore the work piece in total, these are steadied in two places to avoid deflection while cutting. Synchronized line boring can be done in different ways with all cutting edges available at the same time enhancing efficiency without losing the geometric tolerance.
Back Boring Machine
Back boring, amounts to a widely known practice of back recessing allowing machining specifically in shell like scenarios or where general head cannot be accommodated. The process comprises use of unique tools which are capable of bringing edges into position after going through small hole. ‘Back boring tools’ incorporates complex machinations through leverages fitted with gears or pump circuits to open and close cutting edges when required. The methodology is primarily employed in industrial manufacturing applications such aerospace and defense sectors where cuts are made in many dimensions due to the complex geometry of the workpieces.
Precision Boring Machine
The technique known as Precision Boring is used in the removal of materials that contain highly accurate dimensions. This often involves the use of boring heads with fine feed boring spindle fitted or attached to them to get better tolerances range from 0.001 to 0.002mm within which the desired hole can be bored. The tool is equipped with technology that allows a more flexible control of depth, feed, and cutting speed. The operation typically includes several steps, i.e. rough machining, semi-finishing and fine finish machining in order to reach the best result as per ornaments, as well as the accuracy of the location of the workpiece correlating the nominal dimensions.
How Does the Boring Process Work?
Precision adjustment program made the starting point and began the process – centering the bore to the spindle of the machine, with the chamber calculated and bore readjusted at a later alignment appropriate for the work piece. Here the step at which work is done by a certain extent necessitates the use of sophisticated metrological instruments such as dial gauges and electronic sensors for positioning (electric automats) to establish the zero coordinates (centre geometrical position) and the level of parallelism between the boring and pre bored holes.
Work will be carried out while passing several specific stages of the cycle. At the very cutting stage the attackers that are boring the surface interact with the material of a workpiece on the territory provided with the higher rates of technological moving and cutting. Abrasive tools have more than a simple rake on the front or active face that allows them to etch the material around the outer circumference of the hole giving the hole a structure. The parameters of the boring - the rotation speed in rounds per minute and a cutting speed in inches or millimeters per chink, are selected with regard to the work material and desired rate of its removal from the workpiece.
Semi-finishing operations come next, where the lesser depths and constant feed rates are used for paring down the workpiece more accurately. I.e as the happy medium (the work is more productive as it involves less time for cutting and at the same time the finishing surfaces are less damaged) which results in removing most of the workpiece material and providing a base for the final fine cuts. In this stage the importance increases on the firmness of the boring bar since any moment of bending or vibration will spoil the geometric neatness of the ready hole.
At the finishing stage, precise cutting parameters are employed in order to ensure the required surface finish and dimensional accuracy. It is considered particularly important to sustain a consistent level of cutting speeds and feeds anywhere in the action of boring. Additionally, during this stage Coolant delivery is another indispensable constituent of the entire operation, working on resizing the temperature of the place where cutting is executed and smoothing transportation of chips adhering to the workpiece.
Boring operation is continuously inspected by measuring systems – dimensional stability and surface roughness are both monitored. In such case, modern CNC boring machines have an inbuilt adaptive control system that permits adjustments in the cutting parameters on automatic without any manual intervention.
Chip control is essential while performing the boring operation. It is ensured through the tool geometry, cutting speed and feed rates and in return will ensure that the generated chips are appropriate in size and shape. These two factors i.e. generation and removal of chips are very important in boring as they help to prevent subsequent tearing of such chips and promote uniform gravity distribution scallop within the length of the hole.
As the job closes in on the final touches measuring and verification steps may become applicable. Modern tech devices, as in calipers and bore gauges, and machines, such as coordinate measuring machines (CMM), may give assurance that further perfection of the hole in respect of the dimensions, roundness and surface roughness beyond allowable limits has been achieved. Should there by any discrepancies from these values, which may cause the entire process to be repeated, this discrepancy would need corrective action such as machining the part completely or repeating the machining of the affected area.
Advanced boring operations may include some elements, such as chamfers, grooves and stepped diameters. In such cases, accurate positioning of the tool and proper planning and path programming are important factors for achieving exact shape and position of the feature. Other ‘auxiliary’ operations that may be done as and when the need arises may also include back boring or counter boring, which entails the use of specific set of tools and other machining activities.

Advantages and Disadvantages of Boring Machining
Advantages of Boring Technique
Thanks to the Advanced Control and Precision, the shop is able to machine holes and surfaces with tolerances of up to ±0.0001 inches. This results from the single cutting point tool’s accurate construction and installation systems used in metal cutting which excludes the deflection of the cutting edge and ensures the hole is always round.
Surface Geometry can range from 125 to 16 sec Ra with ease, since its high drill ratio in a normal scenario. The finishing cutting action results in such smooth surfaces that are perfect for application where cylinder liners or bearings with close bore tolerances are to be installed.
Understanding Limits and Fits here does not only limit itself to the diameter control of boring. It also extends to the control of such parameters like the geodesic errors of centricity, circular runout of a part and the perpendicularity of the bore. This is particularly appealing in cases whereby there are a number of bores and their alignment becomes difficult all the more due to the applications of sleeves as in gear boxes and machines.
Disadvantages of Boring Technique
Time-Consuming Working which involves the preparation of the work and cutting speeds and adjustments can also be slows in order to maintain the accuracy of the equipment. Fine boring, for example, may take between 2-3 times more time for the same boring
Cost Effects are attributable to the use of equipment and running costs. Boring equipment for thin walls and micro particles can be in the range of 50,000 to several hundred thousands of dollars, and the costs of special cutting accessories and measuring instruments are considerable.
Technological Sophistication calls for experienced operators and computer numerically controlled machine programming who must know tool geometry, offset rallies, and speeds and feeds. Moreover, abuse of the tool stick out, the cutting velocity or allowable feed rates, and anti-chatter intervention and intervention parameters calls for high-level intellect.
Economic Considerations
Startup Capital Required would be such items as measuring equipment, tools setting, climate the factory, and specially prepared devices. Some part of the budget will be eaten up by training and confirmation issues.
Production Costs are also factors like how many cutting tools you are using, how much power is necessary, how much oil or coolant needs to be purchased, what is the percentage of machine failure and the percentage of bad quality work. These factors are the most influential in as far as the economic Efficiency of line boring is concerned.
Applications of Boring Machining
Manufacturing Industry Applications
Engine block production is to a large extent made up of boring processes aimed at achieving exact cylindrical bores with respect to pistons and ensuring maximum capacity of the engine. The mechanical engineering practice is characterized by extensive usage of operating bore sizes having high accuracy level within ±0.0002 inches that are functional for the engine piston rings and without excessive appetite of oil. The current manufacturers of vehicles employ use of computerized digital controlled system machine tools incorporating on-line measurement as one way of assuring that there are no much disparities among the production lines in regards to performance quality.
Manufacture of hydraulic gear operates largely by the means of owner comprising work pieces of the kind that basically require especially careful treatment of boring including their housings and even valve bodies. This kind of elements are polished for which 16-32 micro inches Ra would be a typical range of surface roughness, for proper lubrication and leakage importance of the part. Boring operation when employed allows the producers to maintain the surface quality as low as possible which deviates largely from the bore blank’s idealized form due to the geometric tolerance dictated by the performance of a hydraulic system.
Precision Engineering Applications
Like all other components, Aerospace components are usually subjected to bore machining in order to develop bolt holes and bearing diametrically in the turbine housings and other structural elements. The operation in this case is an aerospace application which will have as a mandatory requirement the use of the coordinate measuring machine (CMM) in order to measure critical dimensions. Medical device manufacturing uses micro boring for development of procedures and instruments, for cot producing equipment. In such components very high finish quality is achieved, in some cases the capabili ties of the boring operations may also include roughness values of surface up to 8 µin Ra. It is challenging while abiding all the stringent surface and mechanical requirements at the same time as working with material s such as surgical stainless steel over medical titanium.
Heavy Industry Applications
Large-scale machinery production incorporates boring operations for manufacturing components like turbine casings and industrial pump housings. These applications often involve line boring operations spanning several feet in length, requiring specialized boring bars with vibration dampening systems. The process must maintain cylindricity tolerances across extended lengths while working with large-scale castings and forgings.
Mining equipment manufacturing relies on boring operations for producing components like crusher housings and heavy equipment frames. These applications frequently involve rough boring operations to remove significant amounts of material, followed by finish boring to achieve the required geometric accuracy. The process must accommodate interrupted cuts and varying material hardness common in large casting components while maintaining tool life and productivity.
Marine engineering applications utilize boring operations for manufacturing propeller shafts and stern tube bearings. These components require precise geometric control to ensure proper alignment and minimize vibration during operation. The boring process must achieve cylindricity tolerances while working with large-scale components, often requiring specialized fixturing and support systems to maintain accuracy across extended lengths.
High-Precision Applications
Optical equipment manufacturing employs boring operations for creating precise mounting surfaces and alignment features. These applications demand exceptional surface finish quality and geometric accuracy to maintain optical performance. The boring process must achieve mirror-like surface finishes while maintaining sub-micron level accuracy in critical dimensions.
Scientific instrument production utilizes boring operations for manufacturing components like spectrometer housings and precision measurement equipment. These applications require exceptional dimensional stability and surface quality to ensure instrument accuracy. The boring process must maintain thermal stability and vibration control while achieving the required precision levels.
Infrastructure Applications
Construction equipment manufacturing incorporates boring operations for producing components like excavator arms and bulldozer frames. These applications often involve deep boring operations requiring specialized tool holders and cutting fluid delivery systems. The process must maintain accuracy while working with large-scale components subject to significant wear and environmental exposure.
Railway infrastructure production utilizes boring operations for manufacturing components like wheel bearings and axle housings. These applications demand high geometric accuracy to ensure proper alignment and minimize maintenance requirements. The boring process must achieve consistent quality while working with hardened materials and maintaining strict safety standards for railway applications.

Selection Considerations on Boring Machines
Different kinds of boring machines are specialized to perform certain tasks, so specific forms and configurations of tools are used along with the exact cutting parameters optimization to machine respective workpiece. Selection Of Speed For Cutting can vary significantly depending on what the material making up the workpiece or rather surface and its finishes require to be achieved. Control over the feed takes on an important role in the sense that the right smooths are achieved and tool life or process stability does not affect such effort. It is now possible to carry out a wide range of boring operations with different boring machines in a single boring setup using the multi-axial control capabilities of modern CNC systems.
The choice of boring machine heavily relies on work piece geometry, the type of material, the tolerances expected and the quantity of work. In many projects it can be, skin smoothness for example, that causes that particular boring machine cutter design to be be used, and modified cutting values to be specified. As is drilling with a narrow tool, it can be particularly caused by the difference in available orientations of the features. Refinements in the material modeling of boring operations along with increased adoption of sensors and closure-the-loop machining have driven the boring operations into more critical zones of operation.
Transform Your Manufacturing Precision Today!
Tired of compromising on hole accuracy? Experience the cutting-edge of boring technology with TEAM MFG, where precision meets perfection.
Our state-of-the-art boring solutions achieve tolerances other manufacturers only dream of. From aerospace components to precision medical devices, we're pushing the boundaries of what's possible in hole finishing. Contact us today at engineering for a detailed consultation.
Frequently Asked Questions (FAQs)
Q: What is the principal distinction between boring and drilling?
Both activities are done to create holes but to different extents - in particular drilling makes holes into which boring makes them better; defines an explanation. Boring offers better finishes and excellent geometrical accuracies and most often has to be done before these afterward hole enlargement.
Q: In boring operations, how do you choose the most suitable cutting speed?
Cutting speed selection is based on many factors such as material of workpiece, material of tool, required surface finish and machine rigidity. With steel, speeds can range between 60-120m/min with carbide and 15-30 m/min with HSS.
Q: why would chatter occur within the operation of boring and whats the best way to avoid it?
Chattering often appears when the tool overhang is unequal and the cutting parameters do not correspond very well. The overhang can be reduced, the tool can be stiffened, cutting speeds can be adjusted and boring tooling with vibration suppression can be employed to reduce chattering.
Q: In what situations would one prefer a modular boring tool opposed to a solid boring bar?
Deep-hole applications that need a lot of reach call for modular boring tools over solid boring bars. In addition to that, modular boring tools are suitable in situations where more than one size of hole is to be machined. Also, cases where changing tools is a norm for different sizes of holes require the use of modular boring tools.
Q: In the case of conventional applications, what are the crucial straightness assembly components and what are the mechanisms of their relation?
When discussing hole straightness, such factors as stiffness of the boring bar, the adjustments, if any, to be made in case of two-component boring bar, the principles governing the continuous cutting of the part, and the appropriate flow of the coolant are just some of the factors to be considered. For optimal results, the ratio length of boring bar to bore size should be less than 4:1.
Q: How is the accuracy of the hole ensured in deep hole boring?
Accuracy of holes particularly in deep-hole boring is a function of tool flexibility, thermal growth and interpolation along with chip removal. It further entails the use of guide pads, progressive axial depths of cut, through an integrated tool coolant delivery system to ensure accuracy.
Q: What precautions are Taken Amidst Boring Operations? —
Adequate protection against chips, secure positioning of the workpiece, proper shields and guards, and regular inspection of the tools, as well as effective control of the coolant, constitute important safety features.
Q: For What Reason Does Boring Require the Completion of the Task in Two or More Stages?
Complete cutting internally in a single operation is not very effective – full length of boring bar is utilized. One operation boring bars are effective when it comes to projects that requires cutting only at the end of the bore hole. The standard fine boring procedure uses rough and finish boring consecutively.
Q: When boring holes on CNC machine how to prolong the tool life?
We have tool life in mind here. It is all about the right combination of cutting parameters, maintaining enough coolant’ lubricant, wearing the tool check systems, and tool load oriented controlling and program occupancy to name but a few.
Q: What are the main things to keep in mind when trying to make bore cuts in different materials?
When cutting any material, the tool will have to be selected on such criteria as hardness of the material, machinability, chip type or curl formation, thermal properties, optimal cutting conditions, including tool path, feed rate, cutting depth, coolant etc. Different materials will require specific complicated designs of the cutting edge (insert) tools as well as specific coatings.
For more questions, contact TEAM MFG today!


