CNC machining has revolutionized modern manufacturing with its precision and automation. But how do these machines know what to do? The answer lies in G and M codes. These codes are the programming languages that control every movement and function of a CNC machine. In this post, you'll learn how G and M codes work together to achieve precise machining, ensuring efficiency and accuracy in manufacturing processes.
What are G and M Codes?
G and M codes are the backbone of CNC programming. They instruct the machine on how to move and perform various functions. Let's dive into what these codes mean and how they differ.
Definition of G Codes
G codes, short for "Geometry" codes, are the heart of CNC programming. They control the movement and positioning of the machine tools. When you want your tool to move in a straight line or an arc, you use G codes.
G codes tell the machine where to go and how to get there. They specify the coordinates and the type of motion, such as rapid positioning or linear interpolation.
Definition of M Codes
M codes, which stand for "Miscellaneous" or "Machine" codes, handle the CNC machine's auxiliary functions. They control actions like turning the spindle on or off, changing tools, and activating coolant.
While G codes focus on the tool's movement, M codes manage the overall machining process. They ensure the machine operates safely and efficiently.
Differences between G and M Codes
Although G and M codes work together, they serve distinct purposes:
Think of it this way:
| Aspect | G Codes | M Codes |
| Function | Controls movements and positioning | Controls auxiliary machine functions |
| Focus | Tool paths and geometry | Operations like tool changes and coolant |
| Example | G00 (Rapid Positioning) | M03 (Start Spindle, Clockwise) |
History of G and M Codes in CNC Programming
The Development of CNC Machining in the 1950s
The story of G and M codes begins with the birth of CNC machining. In 1952, John T. Parsons collaborated with IBM to develop the first numerically controlled machine tool. This groundbreaking invention laid the foundation for modern CNC machining.
Parsons' machine used punched tape to store and execute machining instructions. It was a revolutionary step towards automating the manufacturing process. However, programming these early machines was a complex and time-consuming task.
Evolution from Punched Tape to Modern G and M Code Programming
As CNC technology advanced, so did the programming methods. In the 1950s, programmers used punched tape to input instructions. Each hole on the tape represented a specific command.
In the late 1950s, a new programming language emerged: APT (Automatically Programmed Tools). APT allowed programmers to use English-like statements to describe machining operations. This made programming more intuitive and efficient.
The APT language laid the groundwork for G and M codes. In the 1960s, these codes became the standard for CNC programming. They provided a more concise and standardized way to control machine tools.
Importance of G and M Codes in Enabling Precise and Automated Machining
G and M codes have played a crucial role in the evolution of CNC machining. They allow machines to follow exact paths, automate complex processes, and ensure repeatability. Without them, achieving the level of precision and efficiency seen in modern manufacturing would be impossible. These codes are the language that translates digital designs into physical parts, making them essential for automated machining.
Common G Codes and Their Functions
| G Code | Function | Description |
| G00 | Rapid Positioning | Moves the tool to specified coordinates at maximum speed (non-cutting). |
| G01 | Linear Interpolation | Moves the tool in a straight line between points at a controlled feed rate. |
| G02 | Circular Interpolation (CW) | Moves the tool in a clockwise circular path to a specified point. |
| G03 | Circular Interpolation (CCW) | Moves the tool in a counterclockwise circular path to a specified point. |
| G04 | Dwell | Pauses the machine for a specified time at its current position. |
| G17 | XY Plane Selection | Selects the XY plane for machining operations. |
| G18 | XZ Plane Selection | Selects the XZ plane for machining operations. |
| G19 | YZ Plane Selection | Selects the YZ plane for machining operations. |
| G20 | Inch System | Specifies that the program will use inches as units. |
| G21 | Metric System | Specifies that the program will use millimeters as units. |
| G40 | Cancel Cutter Compensation | Cancels any tool diameter or radius compensation. |
| G41 | Cutter Compensation, Left | Activates tool radius compensation for the left side. |
| G42 | Cutter Compensation, Right | Activates tool radius compensation for the right side. |
| G43 | Tool Height Offset Compensation | Applies tool length offset during machining. |
| G49 | Cancel Tool Height Compensation | Cancels tool length offset compensation. |
| G54 | Work Coordinate System 1 | Selects the first work coordinate system. |
| G55 | Work Coordinate System 2 | Selects the second work coordinate system. |
| G56 | Work Coordinate System 3 | Selects the third work coordinate system. |
| G57 | Work Coordinate System 4 | Selects the fourth work coordinate system. |
| G58 | Work Coordinate System 5 | Selects the fifth work coordinate system. |
| G59 | Work Coordinate System 6 | Selects the sixth work coordinate system. |
| G90 | Absolute Programming | Coordinates are interpreted as absolute positions relative to a fixed origin. |
| G91 | Incremental Programming | Coordinates are interpreted relative to the current tool position. |
Common M Codes and Their Functions
| M Code | Function | Description |
| M00 | Program Stop | Temporarily stops the CNC program. Requires operator intervention to continue. |
| M01 | Optional Program Stop | Stops the CNC program if the optional stop is activated. |
| M02 | Program End | Ends the CNC program. |
| M03 | Spindle On (Clockwise) | Starts the spindle rotating clockwise. |
| M04 | Spindle On (Counterclockwise) | Starts the spindle rotating counterclockwise. |
| M05 | Spindle Off | Stops the spindle rotation. |
| M06 | Tool Change | Changes the current tool. |
| M08 | Coolant On | Turns the coolant system on. |
| M09 | Coolant Off | Turns the coolant system off. |
| M30 | Program End and Reset | Ends the program and resets the control to the beginning. |
| M19 | Spindle Orientation | Orients the spindle to a specified position for tool change or other operations. |
| M42 | High Gear Select | Selects high gear mode for the spindle. |
| M09 | Coolant Off | Turns off the coolant system. |
Auxiliary Functions in G and M Code Programming
Positioning Coordinates (X, Y, Z)
The X, Y, and Z functions control the movement of the tool in 3D space. They specify the target position for the tool to move to.
X represents the horizontal axis (left to right)
Y represents the vertical axis (front to back)
Z represents the depth axis (up and down)
Here's an example of how these functions are used in a G code program:
G00 X10 Y20 Z5 (Rapid move to X=10, Y=20, Z=5)
G01 X30 Y40 Z-2 F100 (Linear move to X=30, Y=40, Z=-2 at a feed rate of 100)
Arc Center Coordinates (I, J, K)
I, J, and K specify the center point of an arc relative to the starting point. They're used with G02 (clockwise arc) and G03 (counterclockwise arc) commands.
I represents the X-axis distance from the start point to the center
J represents the Y-axis distance from the start point to the center
K represents the Z-axis distance from the start point to the center
Check out this example of creating an arc using I and J:
G02 X50 Y50 I25 J25 F100 (Clockwise arc to X=50, Y=50 with center at I=25, J=25)
Feed Rate (F)
The F function determines the speed at which the tool moves during cutting operations. It's expressed in units per minute (e.g., inches per minute or millimeters per minute).
Here's an example of setting the feed rate:
G01 X100 Y200 F500 (Linear move to X=100, Y=200 at a feed rate of 500 units/min)
Spindle Speed (S)
The S function sets the rotational speed of the spindle. It's usually expressed in revolutions per minute (RPM).
Take a look at this example of setting the spindle speed:
M03 S1000 (Start spindle clockwise at 1000 RPM)
Tool Selection (T)
The T function selects the tool to be used for the machining operation. Each tool in the machine's tool library has a unique number assigned to it.
Here's an example of selecting a tool:
T01 M06 (Select tool number 1 and perform tool change)
Tool Length Offset (H) and Tool Radius Compensation (D)
H and D functions compensate for variations in tool length and radius, respectively. They ensure accurate positioning of the tool relative to the workpiece.
Check out this example that uses both H and D functions:
G43 H01 (Apply tool length offset using offset number 1)
G41 D01 (Apply tool radius compensation left using offset number 1)
Methods of CNC Programming with G and M Codes
Manual Programming
Manual programming involves writing G and M codes by hand. The programmer creates the code based on the part geometry and machining requirements.
Here's how it typically works:
The programmer analyzes the part drawing and determines the necessary machining operations.
They write the G and M codes line by line, specifying the tool movements and functions.
The program is then loaded into the CNC machine's control unit for execution.
Manual programming gives the programmer complete control over the code. It's ideal for simple parts or quick modifications.
However, it can be time-consuming and prone to errors, especially for complex geometries.
Conversational Programming (Programming at the Machine)
Conversational programming, also known as shop floor programming, is done directly on the CNC machine's control unit.
Instead of writing G and M codes manually, the operator uses interactive menus and graphical interfaces to input the machining parameters. The control unit then generates the necessary G and M codes automatically.
Here are some advantages of conversational programming:
It's user-friendly and requires less programming knowledge
It allows for quick and easy program creation and modification
It's suitable for simple parts and short production runs
However, conversational programming may not be as flexible as manual programming for complex parts.
CAD/CAM Programming
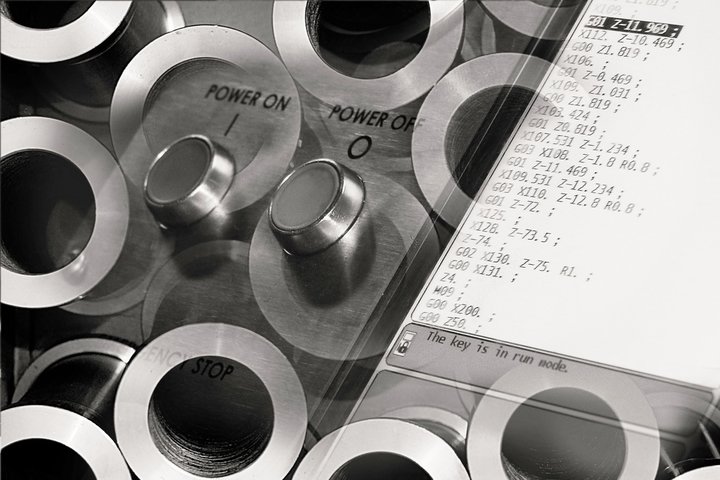
The part is designed using CAD software, creating a 3D digital model.
The CAD model is imported into CAM software.
The programmer selects the machining operations, tools, and cutting parameters in the CAM software.
The CAM software generates the G and M codes based on the selected parameters.
The generated code is post-processed to match the specific requirements of the CNC machine.
The post-processed code is transferred to the CNC machine for execution.
Benefits of CAD/CAM programming:
It automates the code generation process, saving time and reducing errors
It allows for easy programming of complex geometries and 3D contours
It provides visualization and simulation tools to optimize the machining process
It enables faster design changes and updates
Limitations of CAD/CAM programming:
It requires investment in software and training
It may not be cost-effective for simple parts or short production runs
The generated code may require manual optimization for specific machines or applications
When using CAD/CAM software like UG or MasterCAM, consider the following:
Ensure compatibility between the CAD model and CAM software
Select appropriate post-processors for your specific CNC machine and control unit
Customize machining parameters and tool libraries to optimize performance
Verify the generated code through simulation and machine trials
G and M Codes for Different Types of CNC Machines
Milling Machines
Milling machines use G and M codes to control the movement of the cutting tool in three linear axes (X, Y, and Z). They're used for creating flat or contoured surfaces, slots, pockets, and holes.
Some common G codes used in milling machines include:
G00: Rapid positioning
G01: Linear interpolation
G02/G03: Circular interpolation (clockwise/counterclockwise)
G17/G18/G19: Plane selection (XY, ZX, YZ)
M codes control functions like spindle rotation, coolant, and tool changes. For example:
Turning Machines (Lathes)
Turning machines, or lathes, use G and M codes to control the movement of the cutting tool relative to the rotating workpiece. They're used for creating cylindrical parts, such as shafts, bushings, and threads.
In addition to the common G codes used in milling machines, lathes use specific codes for turning operations:
M codes in lathes control functions like spindle rotation, coolant, and turret indexing:
Machining Centers
Machining centers combine the capabilities of milling machines and lathes. They can perform multiple machining operations on a single machine, using multiple axes and tool changes.
Machining centers use a combination of G and M codes used in milling machines and lathes, depending on the specific operation being performed.
They also use additional codes for advanced functions, such as:
Differences and Specific Features
Milling machines use G17/G18/G19 for plane selection, while lathes don't require plane selection codes.
Lathes use specific codes like G33 for thread cutting and G76 for threading cycles, which are not used in milling machines.
Machining centers use additional codes like G43/G44 for tool length compensation and M06 for tool changes, which are not commonly used in standalone milling machines or lathes.

Tips for Effective G and M Code Programming
Best Practices for Organizing and Structuring G and M Code Programs
Here are some best practices to follow when organizing and structuring your G and M code programs:
Start with a clear and descriptive program header, including the program number, part name, and author.
Use comments liberally to explain the purpose of each section or block of code.
Organize the program into logical sections, such as tool changes, machining operations, and ending sequences.
Use consistent formatting and indentation to improve readability.
Modularize the program by using subroutines for repeated operations.
By following these practices, you can create programs that are easier to understand, maintain, and modify.
Strategies for Optimizing Tool Paths and Minimizing Machining Time
Optimizing tool paths and minimizing machining time are critical for efficient CNC machining. Here are some strategies to consider:
Use the shortest possible tool paths to reduce non-cutting time.
Minimize tool changes by sequencing operations effectively.
Use high-speed machining techniques, such as trochoidal milling, for faster material removal.
Adjust feed rates and spindle speeds based on the material and cutting conditions.
Use canned cycles and subroutines to simplify and speed up programming.
(Unoptimized tool path)
G00 X0 Y0 Z1G01 Z-1 F100G01 X50 Y0G01 X50 Y50G01 X0 Y50G01 X0 Y0(Optimized tool path)
G00 X0 Y0 Z1G01 Z-1 F100G01 X50 Y0G01 Y50G01 X0G01 Y0
By implementing these strategies, you can significantly reduce machining time and improve overall efficiency.
Common Mistakes to Avoid in G and M Code Programming
To ensure accurate and efficient machining, avoid these common mistakes in G and M code programming:
Forgetting to include necessary M codes, such as spindle and coolant commands.
Using incorrect or inconsistent units (e.g., mixing inches and millimeters).
Not specifying the correct plane (G17, G18, or G19) for circular interpolation.
Omitting decimal points in coordinate values.
Not considering tool radius compensation when programming contours.
Double-check your code and use simulation tools to catch and correct these mistakes before running the program on the machine.
Importance of Program Verification and Simulation Before Machining
Program verification and simulation are essential steps before running a program on the CNC machine. They help you:
Identify and correct errors in the code.
Visualize the tool paths and ensure they match the desired geometry.
Check for potential collisions or machine limits.
Estimate the machining time and optimize the process.
Most CAM software includes simulation tools that allow you to verify the program and preview the machining process. Take advantage of these tools to ensure your program runs smoothly and produces the expected results.
Review the G and M code for any obvious errors or inconsistencies.
Load the program into the CAM software's simulation module.
Set up the stock material, fixtures, and tools in the simulation environment.
Run the simulation and observe the tool paths, material removal, and machine motions.
Check for any collisions, gouges, or undesired movements.
Verify that the final simulated part matches the intended design.
Make necessary adjustments to the program based on the simulation results.
Summary
In this article, we've explored the essential role of G and M codes in CNC machining. These programming languages control the movements and functions of CNC machines, enabling precise and automated manufacturing.
We've covered the fundamentals of G codes, which handle geometry and tool paths, and M codes, which manage machine functions like spindle rotation and coolant control.
Understanding G and M codes is crucial for CNC programmers, operators, and manufacturing professionals. It allows them to create efficient programs, optimize machining processes, and troubleshoot issues effectively.
FAQs about G and M Codes in CNC Machining
Q: What is the best way to learn G and M code programming?
A: Practice with hands-on experience. Start with simple programs and gradually increase complexity. Seek guidance from experienced programmers or take courses.
Q: Can G and M codes be used with all types of CNC machines?
A: Yes, but with some variations. The basic codes are similar, but specific machines may have additional or modified codes.
Q: Are G and M codes standardized across different CNC control systems?
A: Mostly, but not entirely. The fundamentals are standardized, but some differences exist between control systems. Always refer to the machine's programming manual.
Q: How do I troubleshoot common issues with G and M code programs?
A: Use simulation tools to identify errors. Double-check code for mistakes like missing decimals or incorrect units. Consult machine manuals and online resources.
Q: What resources are available for further learning about G and M codes?
A: Machine programming manuals, online tutorials, forums, and courses. CNC programming books and guides. Practical experience and mentorship from experienced programmers.
Q: How do G and M codes affect machining precision and efficiency?
A: Proper use of codes optimizes tool paths, reduces machining time, and ensures precise movements. Efficient code structure and organization improve overall machining performance.
Q: How can G and M codes be optimized to reduce machining time and improve machining quality?
A: Minimize non-cutting movements. Use canned cycles and subroutines. Adjust feed rates and spindle speeds for optimal cutting conditions.
Q: What advanced functions can be achieved using macros and parametric programming?
A: Automation of repetitive tasks. Creation of custom canned cycles. Parametric programming for flexible and adaptable programs. Integration with external sensors and systems.


